当你 您购买了一台新笔记本电脑 (或PC)没有操作系统,很可能不会将其硬盘格式化。在 安装Windows 11 您必须至少创建将安装操作系统的分区。安装完成后,许多用户面临问题。一些硬盘驱动器分区没有出现 This PC 并且不可用。 Hard Disk partition not showing in Windows 11。
我们采用了您拥有512 GB硬盘笔记本电脑(SSD)的情况。安装Windows 11时,您分配了195 – 200 GB用于系统分区(Windows),并且在硬盘驱动器上可用的其余空间中,您创建了约280 GB的分区。问题在于,安装完成后不会出现此专用数据的专用分区 Windows 11。在此PC中,仅出现带有操作系统的分区。
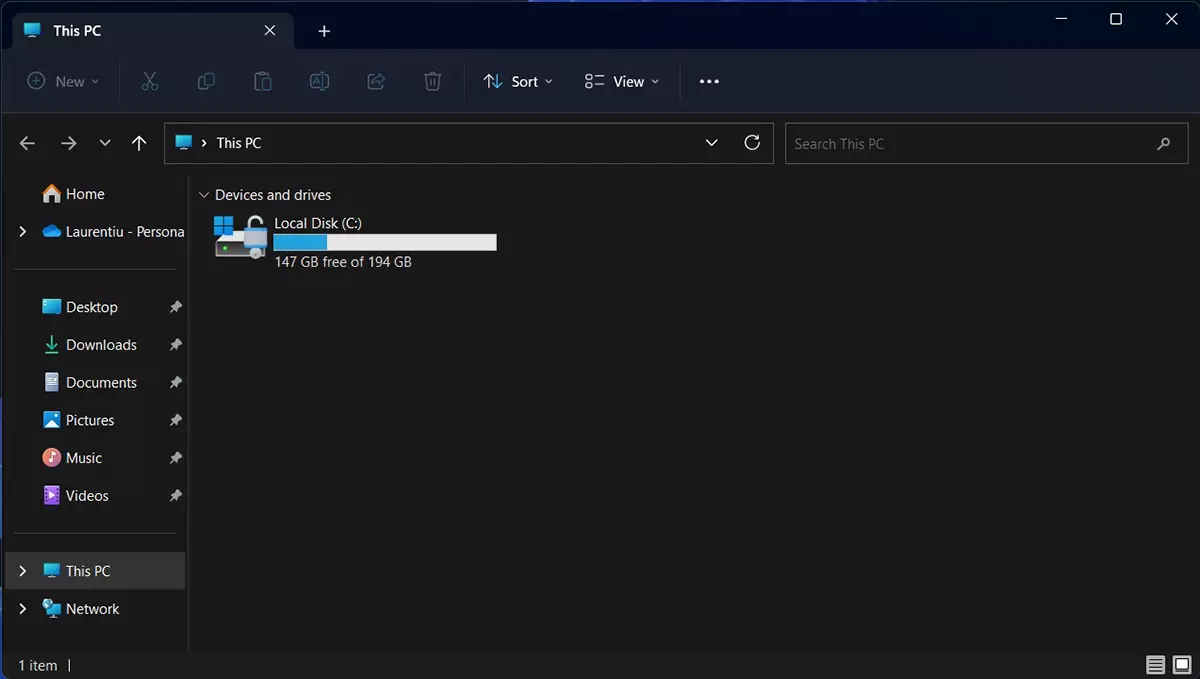
修复未在Windows 11中显示的硬盘分区此PC卷
微软在Windows 11中引入了一个非常好的系统,用于管理硬盘,卷和分区。真实 分区管理器 其中我没有旧版本的Windows。
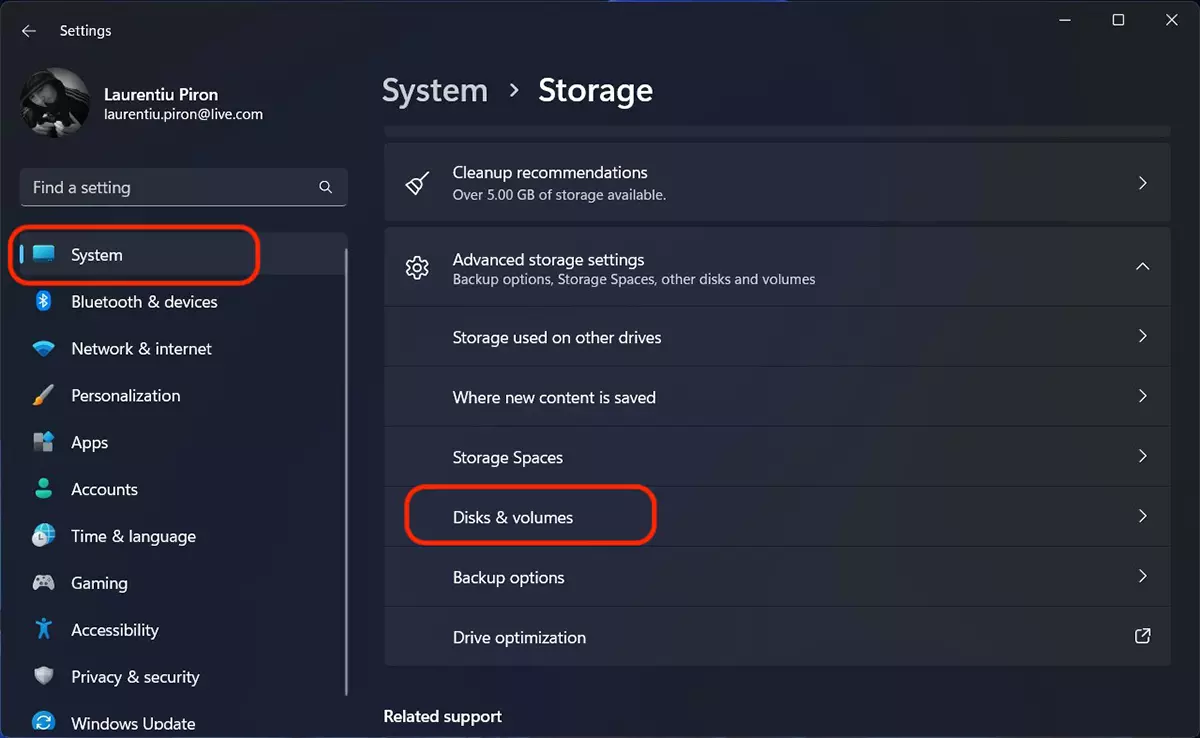
步骤1。
Windows 11 la中的并且MERGI:设置→系统→磁盘 & 卷。
在 “磁盘 & 卷” 它是硬盘(或硬盘驱动器)和卷(或分区)的管理系统。在顶部,安装的硬盘出现在底部的分区之后。
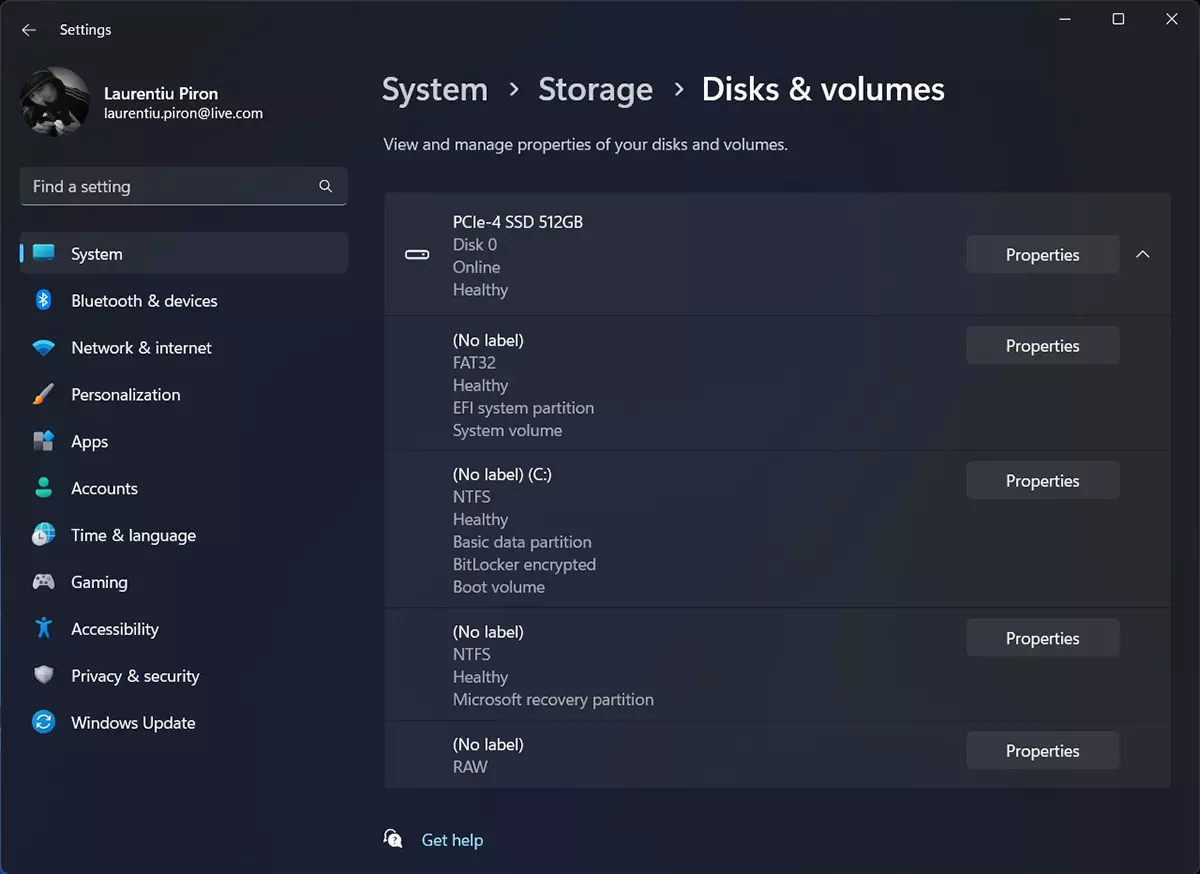
PCIE-4 SSD 512GB – 系统上安装的硬盘。
系统音量 – 由操作系统保留用于EFI分区(可扩展的固件接口)
引导音量 – 派对 C: 在安装Windows 11操作系统并在安装过程中创建的Windows 11操作系统。引导量 /健康。
Microsoft恢复分区 – 在Windows 11的安装中自动创建的分区并保留用于操作系统的复苏。
生的 – 这不是您不知道的分区,也不是硬盘。这是缺乏分区的总空间,我们在这台PC中看不到。硬盘分区未在Windows 11中显示。卷日期。
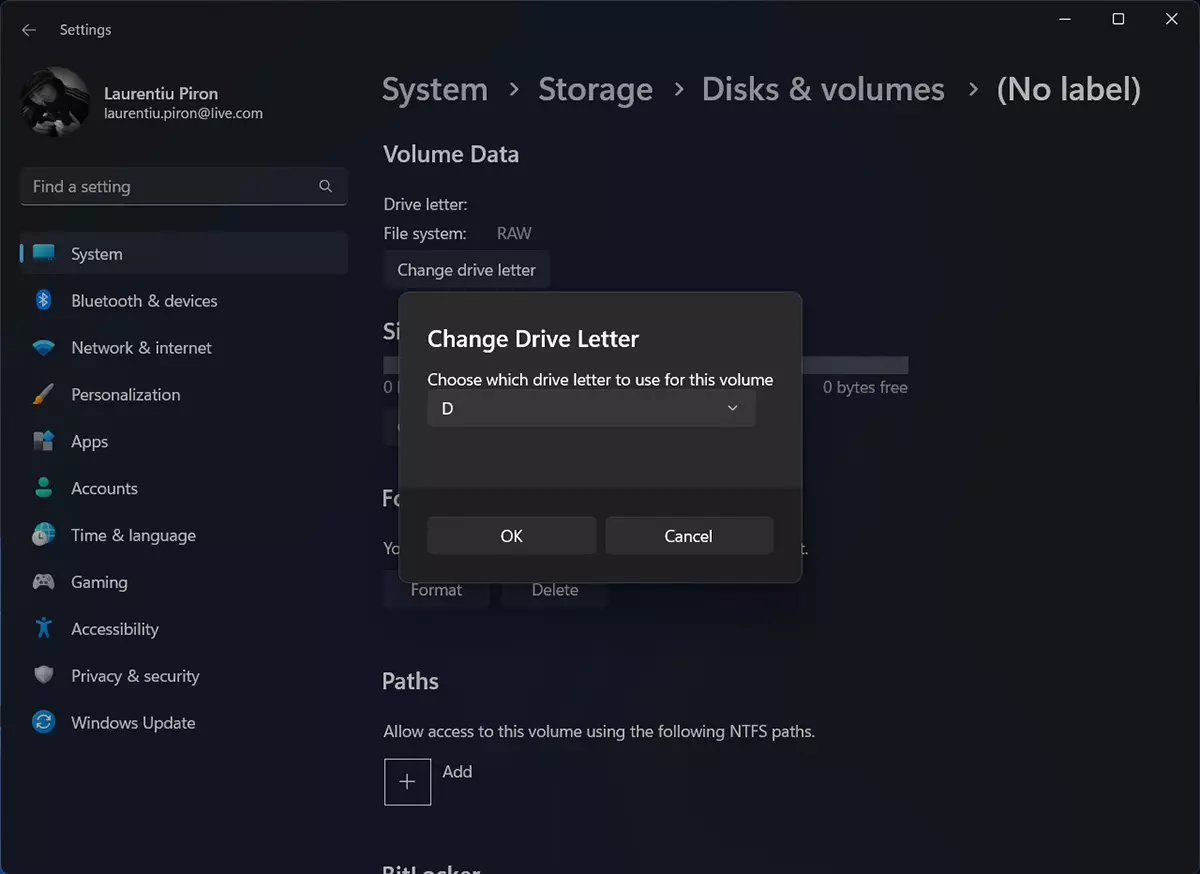
步骤2。
单击PE “Properties” 为了原始,然后单击 “Change drive letter“。在对话框中打开原始音量的字母。在我的例子中,我选择了 D: 这 “Change Drive Letter“。
步骤3。
点击 “Format“。
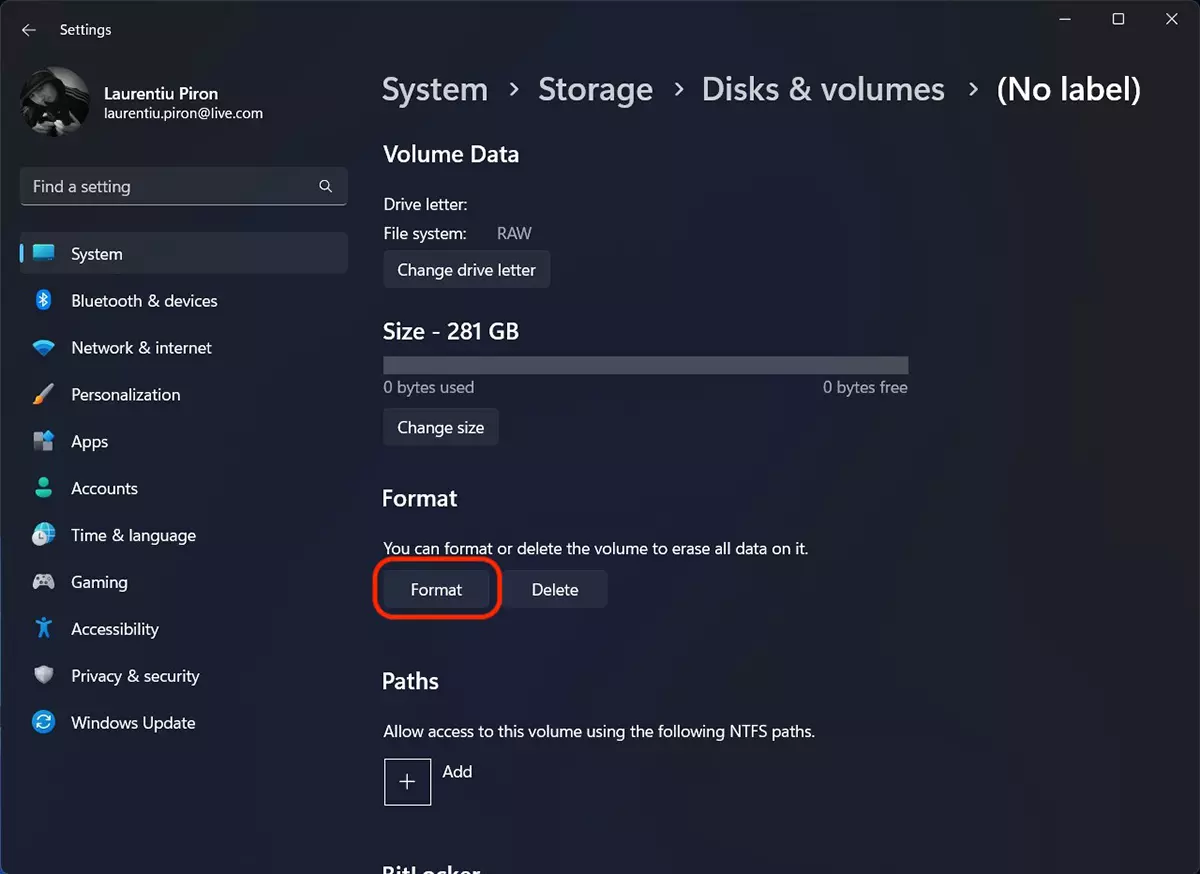
在格式过程的结尾(不应持续很长时间),新的奇偶校验将出现在此PC中,您可以使用可用的空间。

这样,您可以使所有硬盘分区出现在此PC中。如果您不这样做,请发表评论。
Salut,
我在Windows 11 Home有问题。我尝试一个分区,但我没有离开。
向我表示:
可用的收缩空间的大小0
输入缩小0的空间0
收缩后总尺寸0
我尝试了您指示的变体,只是我没有原始
谢谢