在本教程中,您将了解如何 Activezi TLSV1.3或Nginx。这意味着什么 TLSv 1.3, 什么有帮助 为什么 你需要 在网络服务器上 可以激活TLS。用于管理系统的服务器 维克斯 (Centos或Ubuntu)有点困难 Activat TLS 1.3 仅在带有CPANEL的服务器上,但这并非不可能。
内容
为什么TLS 1.3比TLS 1.2好?
TLS (Transport Layer Security) 是一个 加密协议 确保 连接安全性 在计算机及其属于网络之间。 TLS 用于以下应用程序: 电子邮件, 信使, 语音和视频通话 ((VoIP),尤其是在 HTTPS。确保用户的计算机或智能手机以及访问页面的Web服务器之间的安全通信。
TLS 1.3 提供o 更高的速度 客户连接 – 服务器和一个 加上安全性 通过消除算法。 TLSV1.2和TLSV1.3之间的差异。
关于 HTTPS, SSL ((Secure Sockets Layer)我还在其他项目中说:
- 我们如何安装在没有CPANEL或VESTACP的NGINX服务器上为Hostat网站认证的SSL(HTTPS连接)
- Recompilare Openssl 1.1 & TLS 1.3(CentOS 7)的Ningin 1.25
- 如何将博客或WordPress网站从http移至https(nginx)
- 删除旧域certbot证书(让我们加密证书)
如何激活NINX上的TLS 1.3。带有Vestacp / CentOS管理的服务器
在查看如何激活NGINX上的TLSV1.3之前,您需要考虑一些最低要求 TLS 1.3。
- Ningin 1.13.x或更新版本
- 有效的TLS证书
- 域名为Active具有正确配置的DNS活动 – 可以在互联网上访问
- 有效的TLS / SSL证书。可以 Let’s Encrypt。
在很久以前安装的vestacp上,我们只有协议 TLS 1.2。我在许多教程中看到它足够了 nginx.conf 让我们添加以下行,以激活TLS 1.3:
server {

  listen 443 ssl http2;
  listen [::]:443 ssl http2;

  server_name example.com;
  root /var/www/example.com/public;

  ssl_certificate /path/to/your/certificate.crt;
  ssl_certificate_key /path/to/your/private.key;

  ssl_protocols TLSv1.2 TLSv1.3;
错误的。如果 在服务器上 Centos Cu管理 维克斯, Ningx尚未编译 与最低版本 OpenSSL 1.1.1.1, ssl_protocols TLSv1.2 TLSv1.3; 在 nginx.conf ..它无济于事。
[root@north ~]# nginx -V
nginx version: nginx/1.22.0
built by gcc 4.8.5 20150623 (Red Hat 4.8.5-44) (GCC)
built with OpenSSL 1.0.2k-fips  26 Jan 2017
TLS SNI support enabled
ASAR,在上面的示例中NGINX 1.22.0与TLS 1.3版本兼容,但没有帮助书店 OpenSSL 1.0.2k-fips。
为了激活NGINX上的TLSV1.3,您必须首先安装童年和开发软件包的书店。 Development Tools。在CentOS 7命令行中执行:
yum install gcc gcc-c++ pcre-devel zlib-devel make unzip gd-devel perl-ExtUtils-Embed libxslt-devel openssl-devel perl-Test-Simple
yum groupinstall 'Development Tools'
1。安装最新版本 OpenSSL
目前,最新版本是 OpenSSL 1.1.1p,但据我所知,已经有OpenNSL 3。 openssl.org。
cd /usr/src
wget https://www.openssl.org/source/openssl-1.1.1p.tar.gz
tar xvf openssl-1.1.1p.tar.gz
mv openssl-1.1.1p openssl
cd openssl
./config --prefix=/usr/local/openssl --openssldir=/usr/local/openssl --libdir=/lib64 shared zlib-dynamic
make -j4
make test
make install
运行非常重要 make test 在安装书店之前。如果测试中发生了错误,请勿运行 make install 直到纠正错误。
在下一步,我们对当前二进制文件进行备份 openssl 我补充 symlink 到新的。
mv /usr/bin/openssl /usr/bin/openssl-backup
ln -s /usr/local/openssl/bin/openssl /usr/bin/openssl
在 /usr/local/openssl/bin 执行 ldd 验证openssl成瘾。我们还可以验证OPENSL版本。命令 openssl version。
[root@north bin]# ldd openssl
	linux-vdso.so.1 =>  (0x00007ffd20bd7000)
	libssl.so.1.1 => /lib64/libssl.so.1.1 (0x00007fab09b62000)
	libcrypto.so.1.1 => /lib64/libcrypto.so.1.1 (0x00007fab09675000)
	libdl.so.2 => /lib64/libdl.so.2 (0x00007fab09471000)
	libpthread.so.0 => /lib64/libpthread.so.0 (0x00007fab09255000)
	libc.so.6 => /lib64/libc.so.6 (0x00007fab08e87000)
	/lib64/ld-linux-x86-64.so.2 (0x00007fab09df5000)
[root@north bin]# openssl version
OpenSSL 1.1.1p  21 Jun 2022
目前,我们安装了最新版本 OpenSSL 支持 TLSv1.3。我们可以检查版本 TLS / SSL 由图书馆员的支持 OpenSSL 按顺序:
[root@north bin]# openssl ciphers -v | awk '{print $2}' | sort | uniq
SSLv3
TLSv1
TLSv1.2
TLSv1.3
[root@north bin]#
这并不意味着在经理的帮助下托管的网站 VestaCP 他们会立即 TLS 1.3。
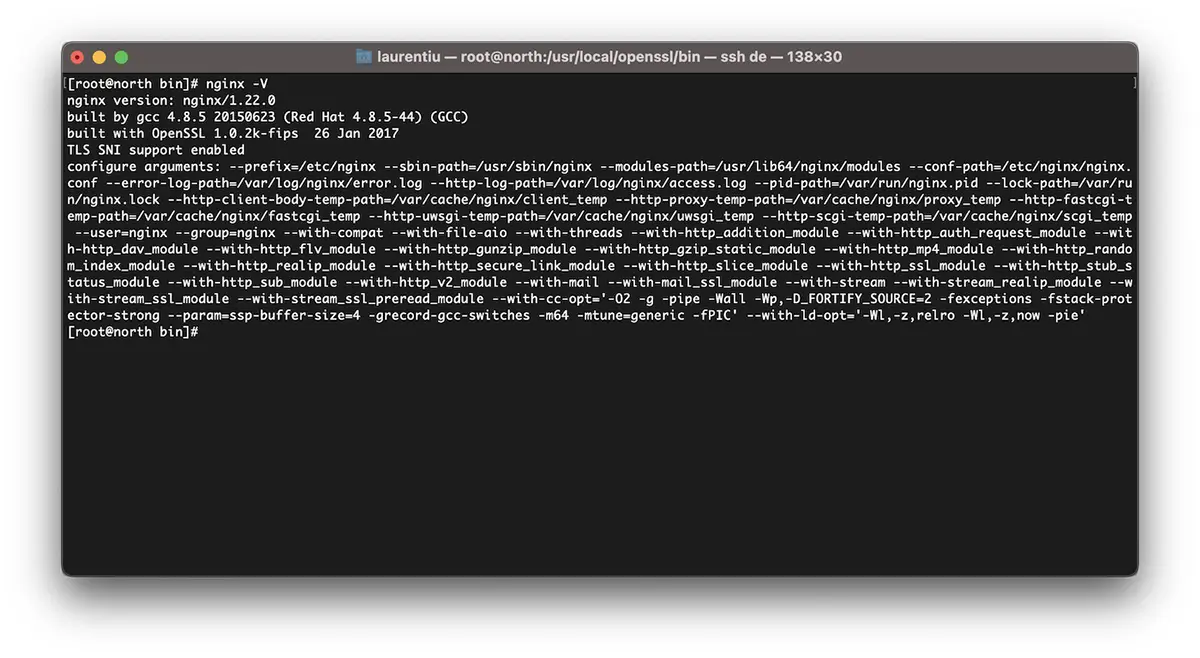
尽管我们已经安装了 OpenSSL 1.1.1p,nginx与旧版本编译 OpenSSL 1.0.2k-fips。
[root@north bin]# nginx -V
nginx version: nginx/1.22.0
built by gcc 4.8.5 20150623 (Red Hat 4.8.5-44) (GCC)
built with OpenSSL 1.0.2k-fips  26 Jan 2017
TLS SNI support enabled
configure arguments: --prefix=/etc/nginx --sbin-path=/usr/sbin/nginx --modules-path=/usr/lib64/nginx/modules --conf-path=/etc/nginx/nginx.conf --error-log-path=/var/log/nginx/error.log --http-log-path=/var/log/nginx/access.log --pid-path=/var/run/nginx.pid --lock-path=/var/run/nginx.lock --http-client-body-temp-path=/var/cache/nginx/client_temp --http-proxy-temp-path=/var/cache/nginx/proxy_temp --http-fastcgi-temp-path=/var/cache/nginx/fastcgi_temp --http-uwsgi-temp-path=/var/cache/nginx/uwsgi_temp --http-scgi-temp-path=/var/cache/nginx/scgi_temp --user=nginx --group=nginx --with-compat --with-file-aio --with-threads --with-http_addition_module --with-http_auth_request_module --with-http_dav_module --with-http_flv_module --with-http_gunzip_module --with-http_gzip_static_module --with-http_mp4_module --with-http_random_index_module --with-http_realip_module --with-http_secure_link_module --with-http_slice_module --with-http_ssl_module --with-http_stub_status_module --with-http_sub_module --with-http_v2_module --with-mail --with-mail_ssl_module --with-stream --with-stream_realip_module --with-stream_ssl_module --with-stream_ssl_preread_module --with-cc-opt='-O2 -g -pipe -Wall -Wp,-D_FORTIFY_SOURCE=2 -fexceptions -fstack-protector-strong --param=ssp-buffer-size=4 -grecord-gcc-switches -m64 -mtune=generic -fPIC' --with-ld-opt='-Wl,-z,relro -Wl,-z,now -pie'
[root@north bin]# openssl version
OpenSSL 1.1.1p  21 Jun 2022
[root@north bin]#
2。 VestaCP
在此步骤中,我们必须重新组合 OpenSSL NGINX版本已经安装 在系统上 CentOS / VestaCP。正如我在上面说的那样,就我而言 nginx/1.22.0。关于一个网络服务器 VestaCP 管理系统,在开始重新编译之前,备份Nginx文件是一件好事。
系统上的备份NGINX电流 VestaCP
存档并保留在服务器上的某个董事 “/etc/nginx” 和 “/usr/local/vesta/nginx“。
跑步 nginx -V 并保存在文件中现有模块中。
configure arguments: --prefix=/etc/nginx --sbin-path=/usr/sbin/nginx --modules-path=/usr/lib64/nginx/modules --conf-path=/etc/nginx/nginx.conf --error-log-path=/var/log/nginx/error.log --http-log-path=/var/log/nginx/access.log --pid-path=/var/run/nginx.pid --lock-path=/var/run/nginx.lock --http-client-body-temp-path=/var/cache/nginx/client_temp --http-proxy-temp-path=/var/cache/nginx/proxy_temp --http-fastcgi-temp-path=/var/cache/nginx/fastcgi_temp --http-uwsgi-temp-path=/var/cache/nginx/uwsgi_temp --http-scgi-temp-path=/var/cache/nginx/scgi_temp --user=nginx --group=nginx --with-compat --with-file-aio --with-threads --with-http_addition_module --with-http_auth_request_module --with-http_dav_module --with-http_flv_module --with-http_gunzip_module --with-http_gzip_static_module --with-http_mp4_module --with-http_random_index_module --with-http_realip_module --with-http_secure_link_module --with-http_slice_module --with-http_ssl_module --with-http_stub_status_module --with-http_sub_module --with-http_v2_module --with-mail --with-mail_ssl_module --with-stream --with-stream_realip_module --with-stream_ssl_module --with-stream_ssl_preread_module --with-cc-opt='-O2 -g -pipe -Wall -Wp,-D_FORTIFY_SOURCE=2 -fexceptions -fstack-protector-strong --param=ssp-buffer-size=4 -grecord-gcc-switches -m64 -mtune=generic -fPIC' --with-ld-opt='-Wl,-z,relro -Wl,-z,now -pie'
如何接受Ninx以升级Opensl / Centos 7
我重复一遍。如果有 维克斯,下载您已经安装的NGINX版本。所有带有NGINX版本的档案 nginx.org。
cd /usr/src
wget https://nginx.org/download/nginx-1.22.0.tar.gz
tar xvf nginx-1.22.0.tar.gz
cd nginx-1.22.0
我们重新编写Nginx模块:
./configure --prefix=/etc/nginx \
--sbin-path=/usr/sbin/nginx \
--modules-path=/usr/lib64/nginx/modules \
--conf-path=/etc/nginx/nginx.conf \
--error-log-path=/var/log/nginx/error.log  \
--http-log-path=/var/log/nginx/access.log  \
--pid-path=/var/run/nginx.pid  \
--lock-path=/var/run/nginx.lock  \
--http-client-body-temp-path=/var/cache/nginx/client_temp  \
--http-proxy-temp-path=/var/cache/nginx/proxy_temp  \
--http-fastcgi-temp-path=/var/cache/nginx/fastcgi_temp  \
--http-uwsgi-temp-path=/var/cache/nginx/uwsgi_temp  \
--http-scgi-temp-path=/var/cache/nginx/scgi_temp  \
--user=nginx  \
--group=nginx  \
--with-compat  \
--with-file-aio  \
--with-threads  \
--with-http_addition_module  \
--with-http_auth_request_module  \
--with-http_dav_module  \
--with-http_flv_module  \
--with-http_gunzip_module  \
--with-http_gzip_static_module  \
--with-http_mp4_module  \
--with-http_random_index_module  \
--with-http_realip_module  \
--with-http_secure_link_module  \
--with-http_slice_module  \
--with-http_ssl_module  \
--with-http_stub_status_module  \
--with-http_sub_module  \
--with-http_v2_module  \
--with-mail  \
--with-mail_ssl_module  \
--with-stream  \
--with-stream_realip_module  \
--with-stream_ssl_module  \
--with-stream_ssl_preread_module  \
--with-openssl=/usr/src/openssl  \
--with-cc-opt='-O2 -g -pipe -Wall -Wp,-D_FORTIFY_SOURCE=2 -fexceptions -fstack-protector-strong  \
--param=ssp-buffer-size=4 -grecord-gcc-switches -m64 -mtune=generic -fPIC'  \
--with-ld-opt='-Wl,-z,relro -Wl,-z,now -pie'
make -j4
make install现在,我们已经安装了Ningx并使用了最新版本的 OpenSSL 能够支持TLSV1.3。
[root@north bin]# nginx -V
nginx version: nginx/1.22.0
built by gcc 4.8.5 20150623 (Red Hat 4.8.5-44) (GCC)
built with OpenSSL 1.1.1p  21 Jun 2022
TLS SNI support enabled
*如果已经在服务器上安装了NGINX,则需要卸载它。汇编在升级ninx上不起作用。
您如何激活vestacp上字段的TLSV1.3
在文件中 /etc/nginx/nginx.conf 我们添加以下行:
ssl_protocols TLSv1.2 TLSv1.3;
ssl_prefer_server_ciphers on;
ssl_ciphers 'ECDHE-ECDSA-AES256-GCM-SHA384:ECDHE-RSA-AES256-GCM-SHA384:ECDHE-ECDSA-CHACHA20-POLY1305:ECDHE-RSA-CHACHA20-POLY1305:ECDHE-ECDSA-AES128-GCM-SHA256:ECDHE-RSA-AES128-GCM-SHA256:ECDHE-ECDSA-AES256-SHA384:ECDHE-RSA-AES256-SHA384:ECDHE-ECDSA-AES128-SHA256:ECDHE-RSA-AES128-SHA256';
在域级别,我更改了模板中的某些内容 维护并激活HTTP/2。因此,在激活Let's Encrypt中添加新域(example.com)时,我有以下SSL配置文件:
cat /home/vestacpuser/conf/web/example.com.nginx.ssl.conf

server {
    listen      IP.IP.IP.IP:443 ssl http2;
    server_name example.com www.example.com;
    root        /home/vestacpuser/web/example.com/public_html;
    index       index.php index.html index.htm;
    access_log  /var/log/nginx/domains/example.com.log combined;
    access_log  /var/log/nginx/domains/example.com.bytes bytes;
    error_log   /var/log/nginx/domains/example.com.error.log error;

    ssl_certificate      /home/vestacpuser/conf/web/ssl.example.com.pem;
    ssl_certificate_key  /home/vestacpuser/conf/web/ssl.example.com.key;

....

ssl_protocols TLSv1.2 TLSv1.3;
ssl_prefer_server_ciphers on;
ssl_ciphers 'ECDHE-ECDSA-AES256-GCM-SHA384:ECDHE-RSA-AES256-GCM-SHA384:ECDHE-ECDSA-CHACHA20-POLY1305:ECDHE-RSA-CHACHA20-POLY1305:ECDHE-ECDSA-AES128-GCM-SHA256:ECDHE-RSA-AES128-GCM-SHA256:ECDHE-ECDSA-AES256-SHA384:ECDHE-RSA-AES256-SHA384:ECDHE-ECDSA-AES128-SHA256:ECDHE-RSA-AES128-SHA256';
在重新启动NGINX之前,在测试其配置之前很好。
[root@north web]# nginx -t
nginx: the configuration file /etc/nginx/nginx.conf syntax is ok
nginx: configuration file /etc/nginx/nginx.conf test is successful
[root@north web]# systemctl restart nginx
我希望本教程对您有用,如果您不成功,请在评论中留下问题的细节。
