このチュートリアルでは、その方法を学びます Activezi tlsv1.3またはnginx。それが意味すること TLSv 1.3、 何が役立ちますか そしてなぜ あなたが必要です ウェブサーバーca TLSをアクティブにすることができます。管理システムを備えたサーバー用 vestacp (Centosまたはubuntu)はもう少し難しいです Activat TLS 1.3の CPANELを使用しているサーバーでのみ、不可能ではありません。
コンテンツ
TLS 1.3がTLS 1.2よりも優れているのはなぜですか?
TLS (Transport Layer Security) それはです 暗号化プロトコル 保証します 接続セキュリティ コンピューターとそれが属するネットワークの間。 TLS 次のようなアプリケーションで使用されます: メール、 メッセンジャー、 音声通話とビデオ通話 (VoIP)、しかし特に HTTPS。ユーザーのコンピューターまたはスマートフォンとアクセスしたページのWebサーバー間の安全な通信を確保します。
TLS 1.3 oを提供します 高速 クライアント接続の – サーバーと1つ プラスセキュリティ アルゴリズムを排除することにより。 TLSV1.2とTLSV1.3の違い。
について HTTPS、 SSL (Secure Sockets Layer)私は他のアイテムでも言いました:
- CPANELまたはVESTACPを使用してNGINXサーバーにHostat Webサイトの認定を受けたSSL(HTTPS Connection)のインストール方法
- Recompilare openSSL 1.1 & TLS 1.3のNingin1.25(Centos 7)
- ブログまたはWordPressのWebサイトをHTTPからHTTPS(nginx)に移動する方法
- 古いドメインの証明書を削除します(証明書を暗号化しましょう)
NinxでTLS 1.3をどのようにアクティブにしますか。 Vestacp / Centos管理を備えたサーバー
nginxでTLSV1.3をアクティブ化する方法を確認する前に、最小限の要件を検討する必要があります TLS 1.3。
- Ningin 1.13.xまたは新しいバージョン
- 有効なTLS証明書
- DNSが正しく構成されているドメイン名がアクティブ – インターネットでアクセスできます
- 有効なTLS / SSL証明書。それは可能です Let’s Encrypt。
ずっと前にインストールされたVestacpには、プロトコルのみがあります TLS 1.2。私は多くのチュートリアルで、それがそうであるように十分であることを見ました nginx.conf TLS 1.3の次の行をアクティブにしましょう。
server {

  listen 443 ssl http2;
  listen [::]:443 ssl http2;

  server_name example.com;
  root /var/www/example.com/public;

  ssl_certificate /path/to/your/certificate.crt;
  ssl_certificate_key /path/to/your/private.key;

  ssl_protocols TLSv1.2 TLSv1.3;
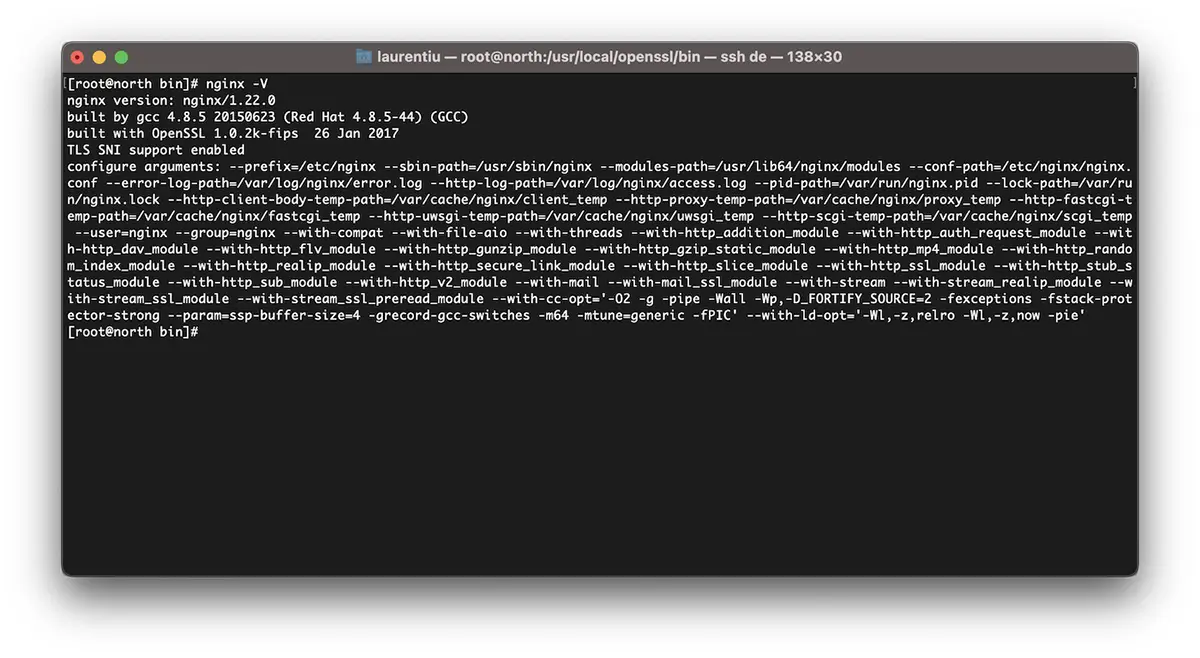
間違い。もし サーバー上 Centos Cu管理 vestacp、 NINGXは編集されていません 最小バージョンで OpenSSL 1.1.1.1、 ssl_protocols TLSv1.2 TLSv1.3; で nginx.conf ..それは何にも役に立ちません。
[root@north ~]# nginx -V
nginx version: nginx/1.22.0
built by gcc 4.8.5 20150623 (Red Hat 4.8.5-44) (GCC)
built with OpenSSL 1.0.2k-fips  26 Jan 2017
TLS SNI support enabled
ASAR、上記の例では、Nginx 1.22.0はTLS 1.3バージョンと互換性がありますが、Bookstoreを助けません OpenSSL 1.0.2k-fips。
NginxでTLSV1.3をアクティブにするには、まず小児期と開発パッケージの書店をインストールする必要があります。 Development Tools。 Centos 7コマンドラインで実行:
yum install gcc gcc-c++ pcre-devel zlib-devel make unzip gd-devel perl-ExtUtils-Embed libxslt-devel openssl-devel perl-Test-Simple
yum groupinstall 'Development Tools'
1.最新バージョンをインストールします OpenSSL
この時点で、最新のバージョンはです OpenSSL 1.1.1p、しかし、私が気づいたことから、すでにopennsl 3がある。 openssl.org。
cd /usr/src
wget https://www.openssl.org/source/openssl-1.1.1p.tar.gz
tar xvf openssl-1.1.1p.tar.gz
mv openssl-1.1.1p openssl
cd openssl
./config --prefix=/usr/local/openssl --openssldir=/usr/local/openssl --libdir=/lib64 shared zlib-dynamic
make -j4
make test
make install
実行することは非常に重要です make test 書店をインストールする前に。テストでエラーが発生した場合、実行しないでください make install エラーが修正されるまで。
次のステップでは、現在のバイナリファイルにバックアップを作成します openssl そして、私は追加します symlink 新しいものに。
mv /usr/bin/openssl /usr/bin/openssl-backup
ln -s /usr/local/openssl/bin/openssl /usr/bin/openssl
で /usr/local/openssl/bin 実行する ldd OpenSSL中毒を確認します。 OpenSLバージョンを確認することもできます。指示 openssl version。
[root@north bin]# ldd openssl
	linux-vdso.so.1 =>  (0x00007ffd20bd7000)
	libssl.so.1.1 => /lib64/libssl.so.1.1 (0x00007fab09b62000)
	libcrypto.so.1.1 => /lib64/libcrypto.so.1.1 (0x00007fab09675000)
	libdl.so.2 => /lib64/libdl.so.2 (0x00007fab09471000)
	libpthread.so.0 => /lib64/libpthread.so.0 (0x00007fab09255000)
	libc.so.6 => /lib64/libc.so.6 (0x00007fab08e87000)
	/lib64/ld-linux-x86-64.so.2 (0x00007fab09df5000)
[root@north bin]# openssl version
OpenSSL 1.1.1p  21 Jun 2022
この時点で、最新バージョンをインストールしています OpenSSL サポート TLSv1.3。バージョンを確認できます TLS / SSL 図書館員によってサポートされています OpenSSL 注文:
[root@north bin]# openssl ciphers -v | awk '{print $2}' | sort | uniq
SSLv3
TLSv1
TLSv1.2
TLSv1.3
[root@north bin]#
これは、マネージャーの助けを借りてホストされたウェブサイトを意味するものではありません VestaCP 彼らはすぐに持っています TLS 1.3。
インストールしていますが OpenSSL 1.1.1p、Nginxは古いバージョンにコンパイルされています OpenSSL 1.0.2k-fips。
[root@north bin]# nginx -V
nginx version: nginx/1.22.0
built by gcc 4.8.5 20150623 (Red Hat 4.8.5-44) (GCC)
built with OpenSSL 1.0.2k-fips  26 Jan 2017
TLS SNI support enabled
configure arguments: --prefix=/etc/nginx --sbin-path=/usr/sbin/nginx --modules-path=/usr/lib64/nginx/modules --conf-path=/etc/nginx/nginx.conf --error-log-path=/var/log/nginx/error.log --http-log-path=/var/log/nginx/access.log --pid-path=/var/run/nginx.pid --lock-path=/var/run/nginx.lock --http-client-body-temp-path=/var/cache/nginx/client_temp --http-proxy-temp-path=/var/cache/nginx/proxy_temp --http-fastcgi-temp-path=/var/cache/nginx/fastcgi_temp --http-uwsgi-temp-path=/var/cache/nginx/uwsgi_temp --http-scgi-temp-path=/var/cache/nginx/scgi_temp --user=nginx --group=nginx --with-compat --with-file-aio --with-threads --with-http_addition_module --with-http_auth_request_module --with-http_dav_module --with-http_flv_module --with-http_gunzip_module --with-http_gzip_static_module --with-http_mp4_module --with-http_random_index_module --with-http_realip_module --with-http_secure_link_module --with-http_slice_module --with-http_ssl_module --with-http_stub_status_module --with-http_sub_module --with-http_v2_module --with-mail --with-mail_ssl_module --with-stream --with-stream_realip_module --with-stream_ssl_module --with-stream_ssl_preread_module --with-cc-opt='-O2 -g -pipe -Wall -Wp,-D_FORTIFY_SOURCE=2 -fexceptions -fstack-protector-strong --param=ssp-buffer-size=4 -grecord-gcc-switches -m64 -mtune=generic -fPIC' --with-ld-opt='-Wl,-z,relro -Wl,-z,now -pie'
[root@north bin]# openssl version
OpenSSL 1.1.1p  21 Jun 2022
[root@north bin]#
2。 VestaCP
このステップでは、補充する必要があります OpenSSL nginxバージョンはすでにインストールされています システム上 CentOS / VestaCP。上で言ったように、私の場合はそれは nginx/1.22.0。持っているウェブサーバーについてです VestaCP 管理システムは、再コンパイルを開始する前に、nginxファイルをバックアップすることができます。
システム上のnginx電流をバックアップします VestaCP
サーバー上のどこかにディレクターをアーカイブして保持します “/etc/nginx” そして “/usr/local/vesta/nginx“。
走る nginx -V 既存のモジュールをファイルに保存します。
configure arguments: --prefix=/etc/nginx --sbin-path=/usr/sbin/nginx --modules-path=/usr/lib64/nginx/modules --conf-path=/etc/nginx/nginx.conf --error-log-path=/var/log/nginx/error.log --http-log-path=/var/log/nginx/access.log --pid-path=/var/run/nginx.pid --lock-path=/var/run/nginx.lock --http-client-body-temp-path=/var/cache/nginx/client_temp --http-proxy-temp-path=/var/cache/nginx/proxy_temp --http-fastcgi-temp-path=/var/cache/nginx/fastcgi_temp --http-uwsgi-temp-path=/var/cache/nginx/uwsgi_temp --http-scgi-temp-path=/var/cache/nginx/scgi_temp --user=nginx --group=nginx --with-compat --with-file-aio --with-threads --with-http_addition_module --with-http_auth_request_module --with-http_dav_module --with-http_flv_module --with-http_gunzip_module --with-http_gzip_static_module --with-http_mp4_module --with-http_random_index_module --with-http_realip_module --with-http_secure_link_module --with-http_slice_module --with-http_ssl_module --with-http_stub_status_module --with-http_sub_module --with-http_v2_module --with-mail --with-mail_ssl_module --with-stream --with-stream_realip_module --with-stream_ssl_module --with-stream_ssl_preread_module --with-cc-opt='-O2 -g -pipe -Wall -Wp,-D_FORTIFY_SOURCE=2 -fexceptions -fstack-protector-strong --param=ssp-buffer-size=4 -grecord-gcc-switches -m64 -mtune=generic -fPIC' --with-ld-opt='-Wl,-z,relro -Wl,-z,now -pie'
Upgrage Opensl / Centos 7のためのニンクスを受信する方法
繰り返します。あなたが持っているなら vestacp、すでにインストールしているnginxバージョンをダウンロードします。あなたが見つけたnginxバージョンを備えたすべてのアーカイブ nginx.org。
cd /usr/src
wget https://nginx.org/download/nginx-1.22.0.tar.gz
tar xvf nginx-1.22.0.tar.gz
cd nginx-1.22.0
nginxモジュールを複製します。
./configure --prefix=/etc/nginx \
--sbin-path=/usr/sbin/nginx \
--modules-path=/usr/lib64/nginx/modules \
--conf-path=/etc/nginx/nginx.conf \
--error-log-path=/var/log/nginx/error.log  \
--http-log-path=/var/log/nginx/access.log  \
--pid-path=/var/run/nginx.pid  \
--lock-path=/var/run/nginx.lock  \
--http-client-body-temp-path=/var/cache/nginx/client_temp  \
--http-proxy-temp-path=/var/cache/nginx/proxy_temp  \
--http-fastcgi-temp-path=/var/cache/nginx/fastcgi_temp  \
--http-uwsgi-temp-path=/var/cache/nginx/uwsgi_temp  \
--http-scgi-temp-path=/var/cache/nginx/scgi_temp  \
--user=nginx  \
--group=nginx  \
--with-compat  \
--with-file-aio  \
--with-threads  \
--with-http_addition_module  \
--with-http_auth_request_module  \
--with-http_dav_module  \
--with-http_flv_module  \
--with-http_gunzip_module  \
--with-http_gzip_static_module  \
--with-http_mp4_module  \
--with-http_random_index_module  \
--with-http_realip_module  \
--with-http_secure_link_module  \
--with-http_slice_module  \
--with-http_ssl_module  \
--with-http_stub_status_module  \
--with-http_sub_module  \
--with-http_v2_module  \
--with-mail  \
--with-mail_ssl_module  \
--with-stream  \
--with-stream_realip_module  \
--with-stream_ssl_module  \
--with-stream_ssl_preread_module  \
--with-openssl=/usr/src/openssl  \
--with-cc-opt='-O2 -g -pipe -Wall -Wp,-D_FORTIFY_SOURCE=2 -fexceptions -fstack-protector-strong  \
--param=ssp-buffer-size=4 -grecord-gcc-switches -m64 -mtune=generic -fPIC'  \
--with-ld-opt='-Wl,-z,relro -Wl,-z,now -pie'
make -j4
make installNingxがインストールされ、最新バージョンが編集されました OpenSSL TLSV1.3をサポートできます。
[root@north bin]# nginx -V
nginx version: nginx/1.22.0
built by gcc 4.8.5 20150623 (Red Hat 4.8.5-44) (GCC)
built with OpenSSL 1.1.1p  21 Jun 2022
TLS SNI support enabled
*nginxがすでにサーバーにインストールされている場合、アンインストールする必要があります。コンパイルは、アップグレードニンクス時には機能しません。
Vestacpのフィールドに対してTLSV1.3をどのようにアクティブにしますか
ファイル内 /etc/nginx/nginx.conf 次の行を追加します。
ssl_protocols TLSv1.2 TLSv1.3;
ssl_prefer_server_ciphers on;
ssl_ciphers 'ECDHE-ECDSA-AES256-GCM-SHA384:ECDHE-RSA-AES256-GCM-SHA384:ECDHE-ECDSA-CHACHA20-POLY1305:ECDHE-RSA-CHACHA20-POLY1305:ECDHE-ECDSA-AES128-GCM-SHA256:ECDHE-RSA-AES128-GCM-SHA256:ECDHE-ECDSA-AES256-SHA384:ECDHE-RSA-AES256-SHA384:ECDHE-ECDSA-AES128-SHA256:ECDHE-RSA-AES128-SHA256';
ドメインのレベルで、私はテンプレートで何かを変更しました vestacpおよびhttp/2をアクティブにします。したがって、アクティブ化されたLet's Encryptを使用して新しいドメイン(Example.com)を追加すると、次のSSL構成ファイルがあります。
cat /home/vestacpuser/conf/web/example.com.nginx.ssl.conf

server {
    listen      IP.IP.IP.IP:443 ssl http2;
    server_name example.com www.example.com;
    root        /home/vestacpuser/web/example.com/public_html;
    index       index.php index.html index.htm;
    access_log  /var/log/nginx/domains/example.com.log combined;
    access_log  /var/log/nginx/domains/example.com.bytes bytes;
    error_log   /var/log/nginx/domains/example.com.error.log error;

    ssl_certificate      /home/vestacpuser/conf/web/ssl.example.com.pem;
    ssl_certificate_key  /home/vestacpuser/conf/web/ssl.example.com.key;

....

ssl_protocols TLSv1.2 TLSv1.3;
ssl_prefer_server_ciphers on;
ssl_ciphers 'ECDHE-ECDSA-AES256-GCM-SHA384:ECDHE-RSA-AES256-GCM-SHA384:ECDHE-ECDSA-CHACHA20-POLY1305:ECDHE-RSA-CHACHA20-POLY1305:ECDHE-ECDSA-AES128-GCM-SHA256:ECDHE-RSA-AES128-GCM-SHA256:ECDHE-ECDSA-AES256-SHA384:ECDHE-RSA-AES256-SHA384:ECDHE-ECDSA-AES128-SHA256:ECDHE-RSA-AES128-SHA256';
nginxを再起動する前に、その構成をテストする前に良好です。
[root@north web]# nginx -t
nginx: the configuration file /etc/nginx/nginx.conf syntax is ok
nginx: configuration file /etc/nginx/nginx.conf test is successful
[root@north web]# systemctl restart nginx
このチュートリアルが役立つことを願っています。成功しなければ、問題の詳細をコメントに残してください。
NinxでTLSV1.3をどのようにアクティブにしますか。 vestacp / centosまたはubuntu
について ステルス
技術に情熱を持ち、2006年からStealthSettings.comで喜んで執筆しています。macOS、Windows、Linuxのオペレーティングシステムだけでなく、プログラミング言語やブログプラットフォーム(WordPress)、オンラインストア(WooCommerce、Magento、PrestaShop)にも豊富な経験があります。
ステルスの投稿をすべて表示あなたも興味があるかもしれません...


