How can we test Windows 8.1 without doing it itself
There was another month until Windows 8.1 will become available to the public, Microsoft announcing some time ago as official launch of this operating system will take place on October 17, 2013. After launch, Windows 8.1 will be able to be downloaded and installed free (in the form of update) via Windows Store by all users Windows 8, and will also be available as retail version for all other users who want to Upgradeze of the Windows XP, Windows Vista or Windows 7.
If you do not Tested still Windows 8.1 (yet You can Download FREE Preview version its) you have enough time to do it before the final version is launched. And if you do not want to go through Installation procedure of the system, there is also a method by which You can test Windows 8.1 without installing it.
How can we test Windows 8.1 without installing the operating system?
- First of all Download ISO image a Windows 8.1 Preview, then Extract the content it in one folder In an easy-to-retain location
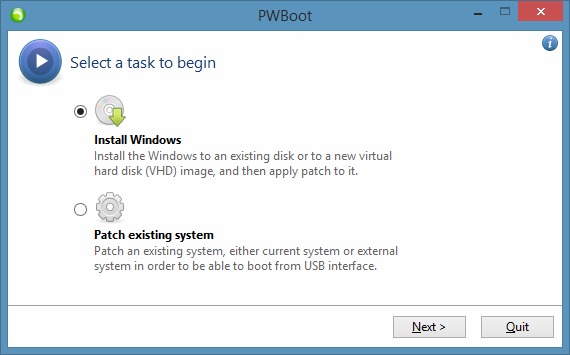
- Download and run the application PWBoot (this does not require installation), then select the option Install Windows and click on Next
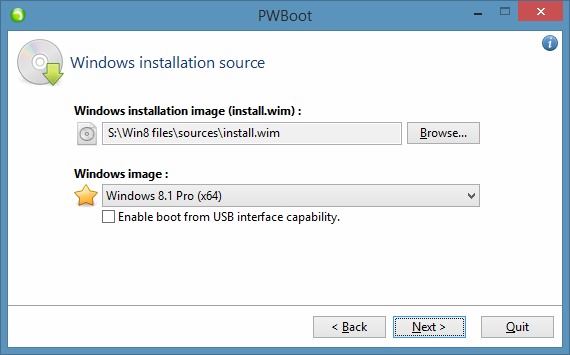
- sub Windows installation image Click on Browse And browse to the folder where you extracted the content of the installation image, open the folder sources and select the file install.wim
- sub Windows image Select Windows 8.1 Pro And you will disperse the option Enable boot from USB interface capability, then click on Next
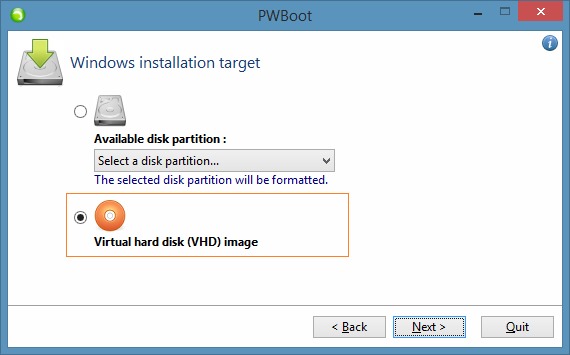
- in Windows installation target Select Virtual hard disk (VHD) image and give again click on Next
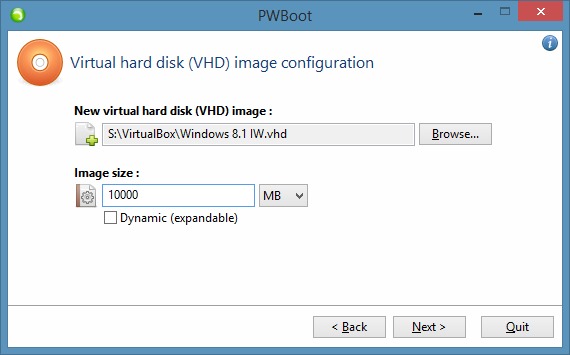
- sub New virtual hard disk (VHD) image Select the location Where do you want to save the VHD image of the system, then below Image size Select SIZE desired for the image (Minim 10 GB), check the option Dynamic (expandable) and click on Next
- in System boot configuration, select under System boot volume the partition you have installed the main operating system (usually this is C:) and uncheck the options Update bootcode and Overwrite existing BCD store, then tatter NAMEs for the image VHD created cu PWBoot And you will disperse the option Add boot entry to BCD store
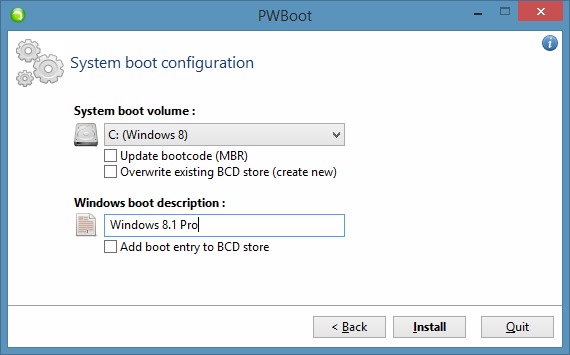
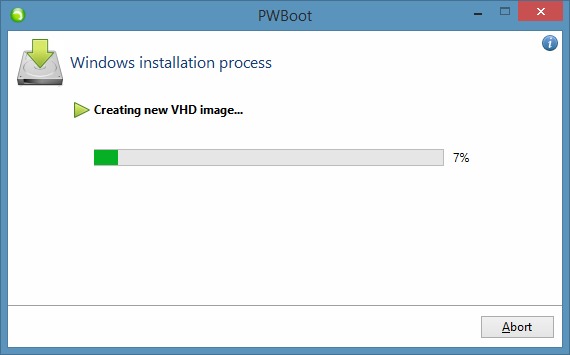
- Then click on the button Install and on Yes To confirm the creation of the VHD image, and wait for it to be created.
After VHD image cu Windows 8.1 is created, download and install the application EasyBCD. Run the application and click on Add New Entry, then, below Portable/External Media, select Microsoft VHD in the right to Type, write Windows 8.1 in the right to Name, then click on Browse in the right to Path, navigated catre the location where you saved VHD image and select it, and finally click the button Add Entry.
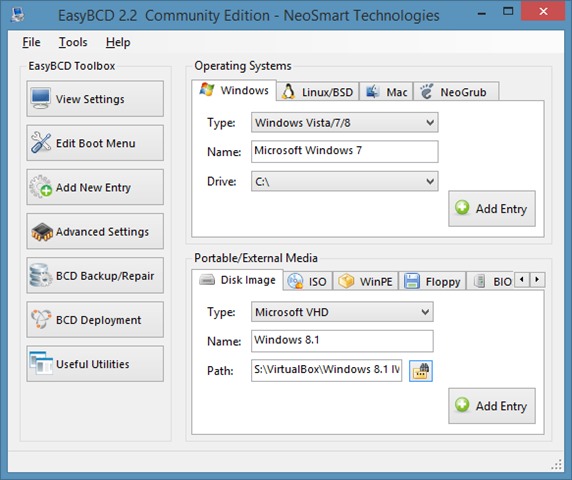
Then restart the system, select the new Input Windows 8.1 FROM boot menu And give Enter. To be able to testa Windows 8.1 You will need to enter License code (which you can find here) then to create a user and ready. You will be able to test Windows 8.1 (Preview) without going through the procedure for installing it.
Download EasyBCD (free version).
If you want to Delete Windows 8.1 entry FROM Boot menu you are Delete the VHD image created (To create space-bar or for various other reasons), restart your computer then select from boot menu The main operating system. Then run again EasyBCD, click on Edit Boot Menu, select the entrance Windows 8.1 and click on Delete.
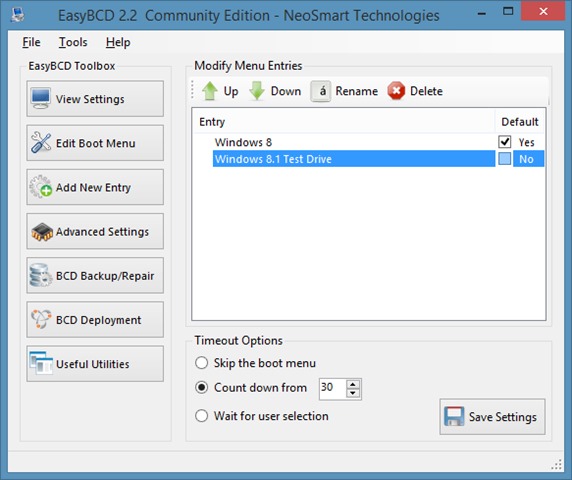
And to Delete the VHD image created with Windows 8.1, navigated catre the location where this saved is and simply delete it using Shift+Delete. Much success!
STEALTH SETTINGS – How to test Windows 8.1 without really installing it
How can we test Windows 8.1 without doing it itself
What’s New
About Stealth
Passionate about technology, I write with pleasure on stealthsetts.com starting with 2006. I have a rich experience in operating systems: Macos, Windows and Linux, but also in programming languages and blogging platforms (WordPress) and for online stores (WooCommerce, Magento, Presashop).
View all posts by StealthYou may also be interested in...

