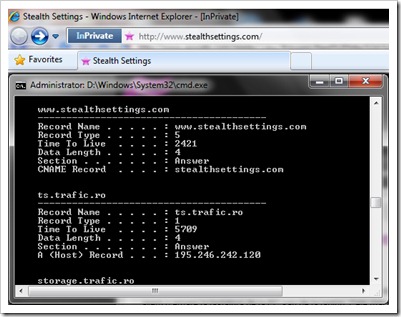
새로운 기술을 사용하는 경우 의자 “부인” 에이 인터넷 익스플로러 8 또는 “개인 탐색” 에이 Chrome, care ar trebui sa nu stocheze nicio informatie dupa navigarea pe web site-uri, iata ca ceva tot ramane in PC. DNS 캐시-UL.

Pentru a vedea DNS Cache-ul este suficient sa deschideti 명령 프롬프트 si sa tastati :
ipconfig /displaydnsClear, Reset or Flush DNS Cache in Windows Vista, Windows 7 si Windows XP.
Tastati in Command Prompt :
ipconfig /flushdnsO sa primiti mesajul:
Windows IP 구성
DNS Resolver 캐시를 성공적으로 플러시했습니다.
~ 안에 Windows Vista 그리고 Windows 7 va trebui sa deschideti CMD와 관리자 권한 pentru a sterge DNS Cache.
Stop DNS Cache (metoda valabila pe toate sistemele de operare)
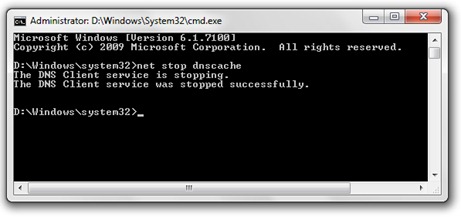
Pentru a opri DNS Cache-ul deschidem Command Prompt si scriem urmatoarea linie de comanda:
net stop dnscache
아니면 일련의 소프트웨어-uri 바이러스 백신 그리고 방화벽 va ofera inca din faza de instalare optiunea de a dezactiva DNS Cache, iar Internet Browser-ul 모질라 파이어 폭스 va pune la dispozitie un 부가 기능 prin care puteti sa activati / dezactivati DNS Cache cu un singur click.
Allows you to disable and enable the DNS Cache of Firefox:
https://addons.mozilla.org/en-US/firefox/addon/5914
*Pentru a va face o idee asupra DNS 캐시 그리고 DNS 캐시 Poisoning, am gasit un articol foarte bun pe 위키 백과.
장애를 입히다 & DNS 캐시를 제거합니다 – Windows 7, Vista & xp
에 대한 스텔스 L.P.
창립자 및 편집자 Stealth Settings, din 2006 pana in prezent. Experienta pe sistemele de operare Linux (in special CentOS), Mac OS X , Windows XP > Windows 10 Si WordPress (CMS).
Stealth L.P.의 모든 게시물 보기당신은 또한에 관심이있을 수 있습니다 ...


2개의 생각 “장애를 입히다 & DNS 캐시를 제거합니다 – Windows 7, Vista & xp”
Nagyon sokat segítettél Te vagy a leghasznosabb évek óta számomra! Köszönöm!
you are welcome ;-)