
Usually IP addresses are automatically distributed by router by protocol DHCP (Dynamic Host Configuration Protocol). This means that the device will not permanently have the same IP address. If you have a media server or other device you need to always use the same IP, the tutorial “How do you set Static IP address to Windows 11” It will be helpful.
The reasons why a static IP address is needed are quite few. It is generally used when on PC / server with Windows 11 Run an application that you need not to change the IP address.
How do you set Static IP address to Windows 11
The network settings have a very friendly interface on Windows 11 and you do not need IT experience to set the static IP address on Windows 11.
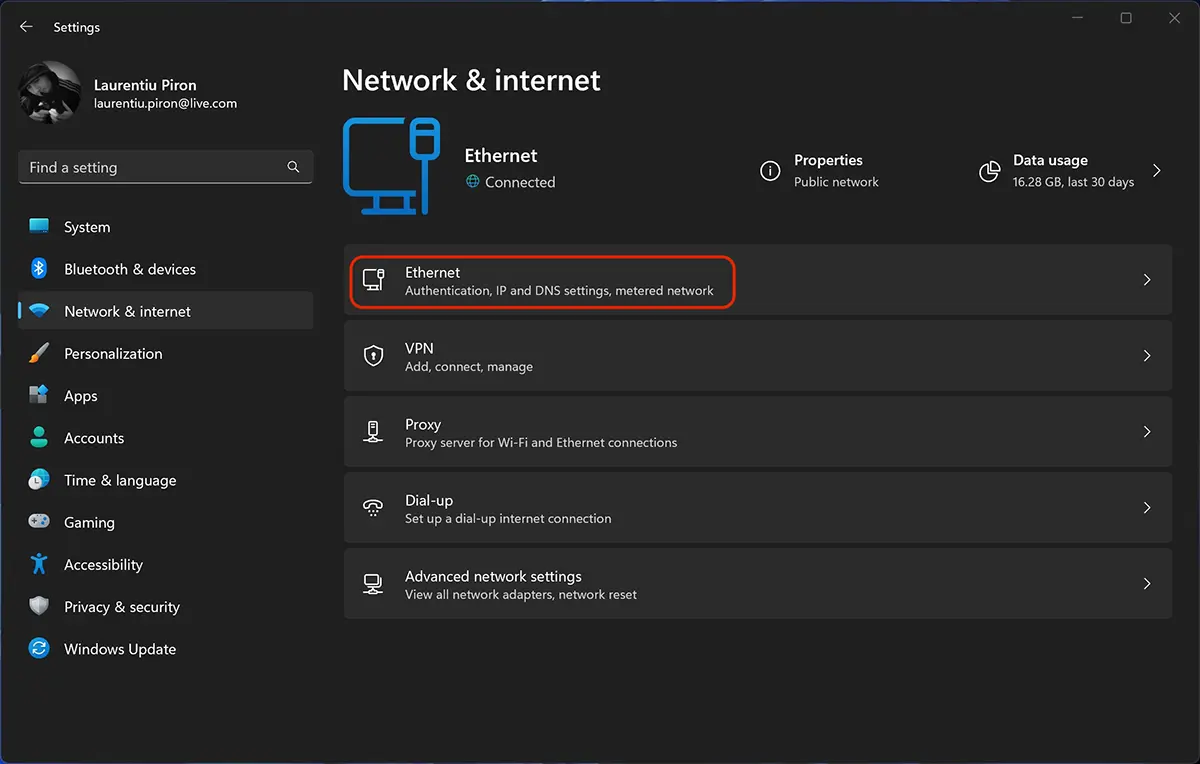
1. Open Settings, then in the left side of the left go to Network & Internet.
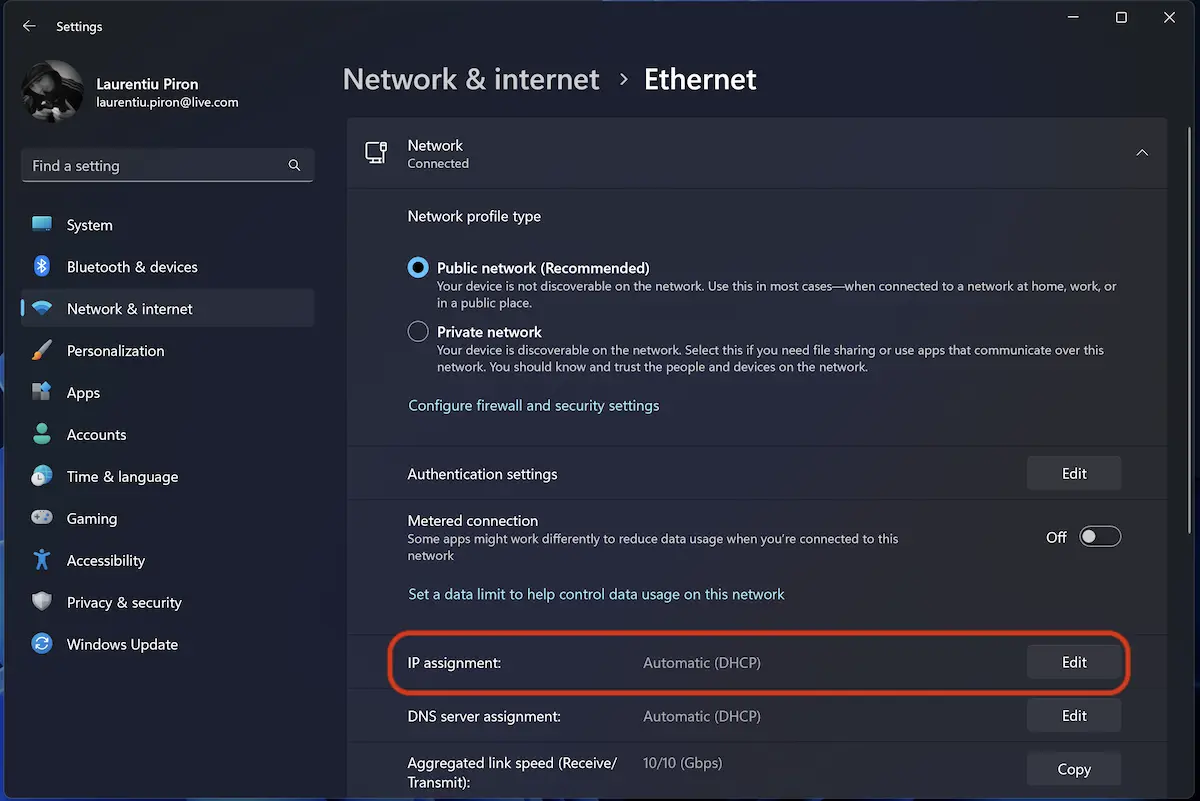
2. Go to the connection settings Ethernet (or Wi-fi). Here you can configure DNS and type of connection.
3. Click pe Edit the “IP assignment“, where in the picture below is set Automatic (DHCP).
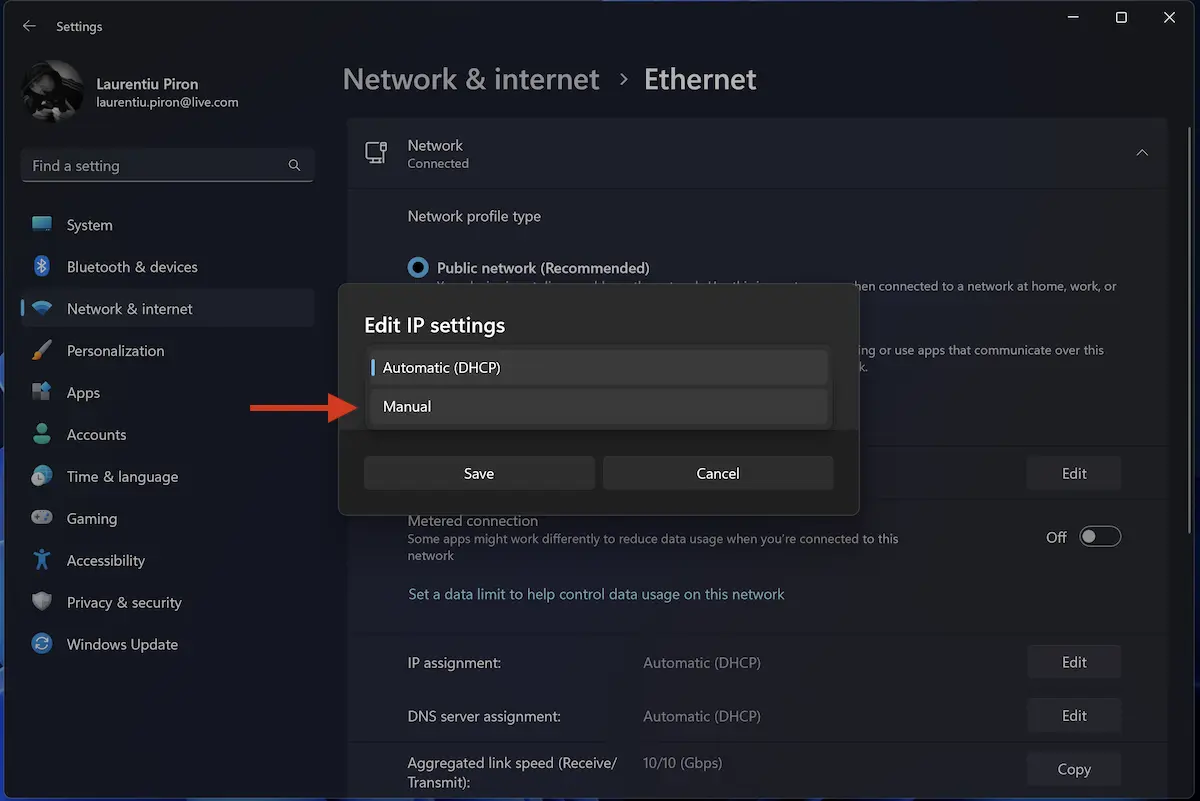
4. You choose the mode “Manual” the “Edit IP Settings“.
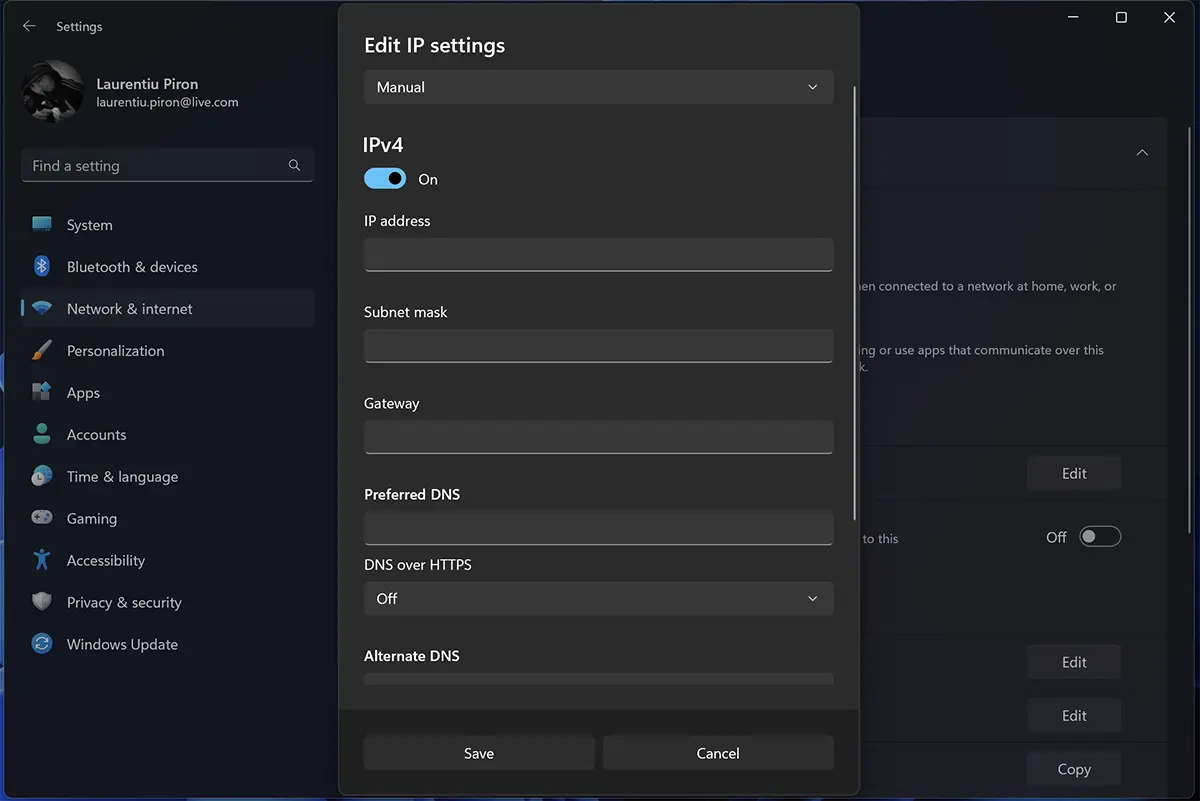
5. Select IPv4, then set the static IP address.
After saving the new settings, the computer will permanently keep its IP address (local).
You may also be interested in...
