If you need to add a business email account on iPhone or iPad, in this tutorial you will see step by step how you can do this.
iPhone and iPad I use very similar operating systems (iOS and iPadOS), and the steps you can add an email account in the application Mail, they are similar.
application Mail from iOS and iPadOS Provides quick support for email accounts on fields such as: iCloud.com, Microsoft Exchange, Google, Yahoo, Aol and Outlook.com.
If you have a business email address, this involves a personalized domain name, which you need to manually configure it in the application Mail. Most likely the email address is made on the company's web domain.
How do you add a business email account on iPhone or iPad
Before him Add a business email account on iPhone or iPad, make sure you know all the technical data of the email account. Besides the user and password, you need the email server for incoming (POP/IMAP), the email server for outgoing (SMTP), the ports related to the two protocols and security settings.
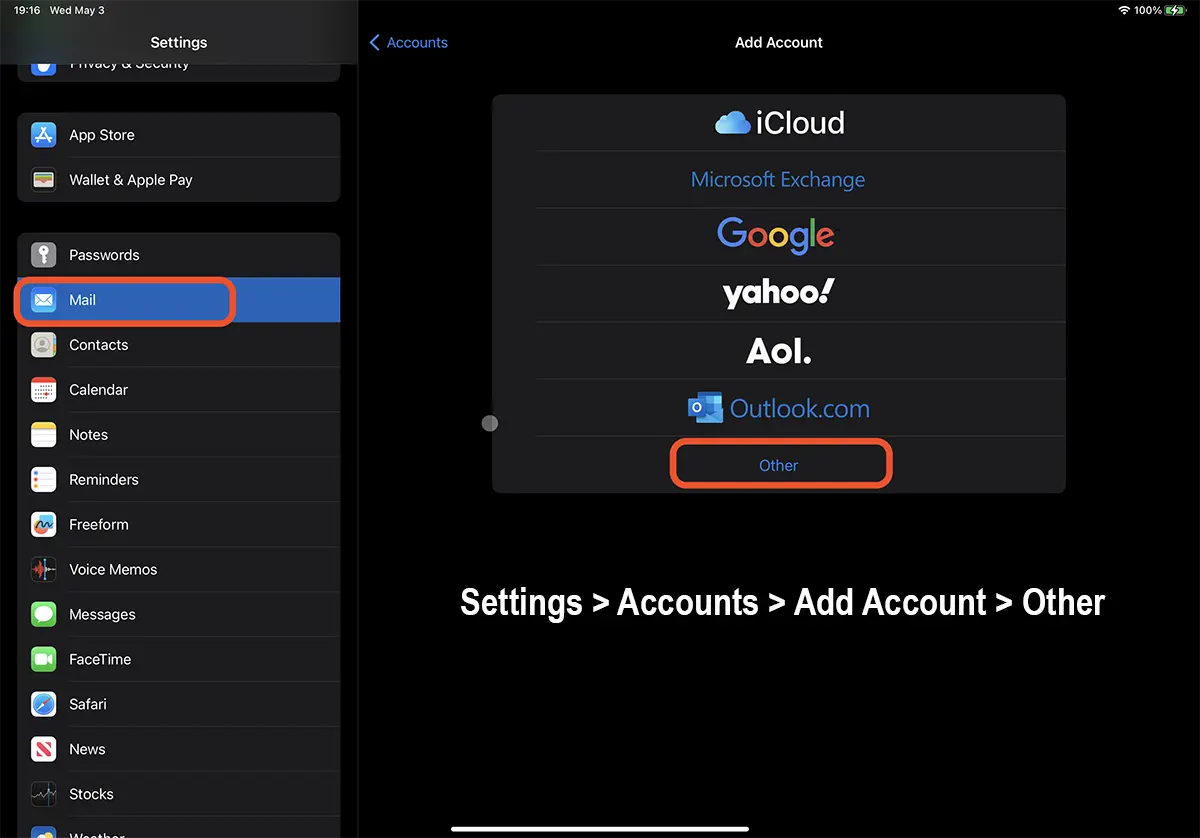
1. Open “Settings” on iPhone or iPad, go to Mail, Accounts > Add Account then to Other, to add an email address from a business or personal domain.
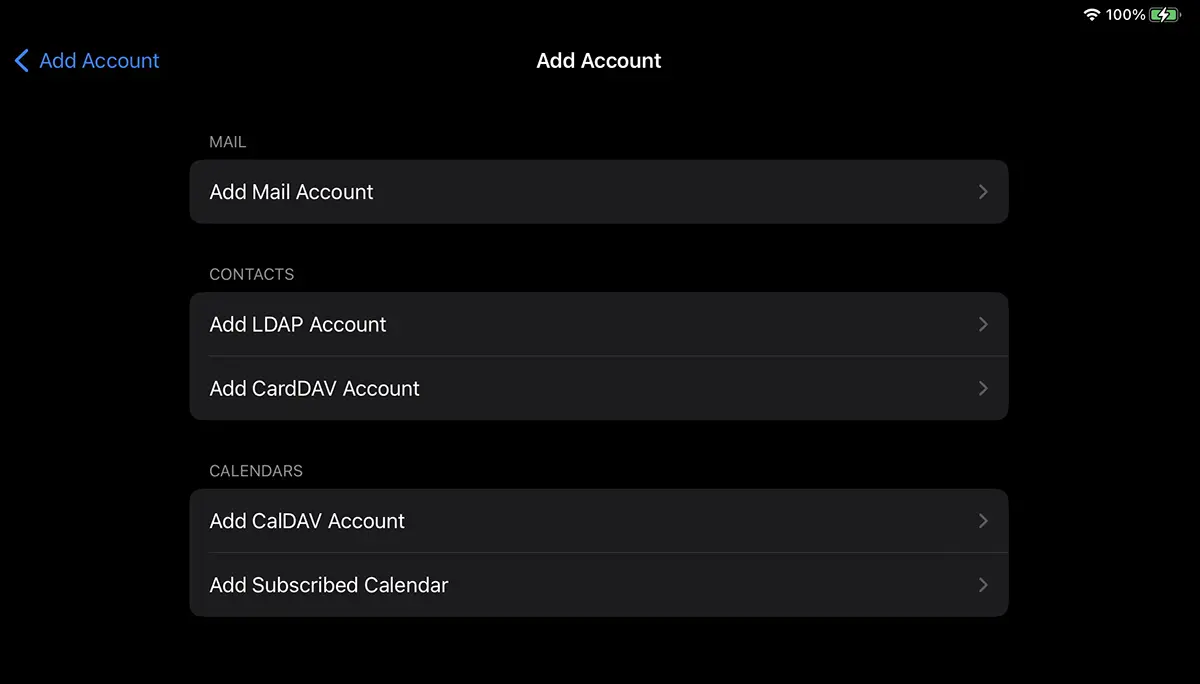
2. Through the application Mail We can add several types of accounts, including for Calendar or Contacts. We will be interested in the option for Mail. Add Mail Account.
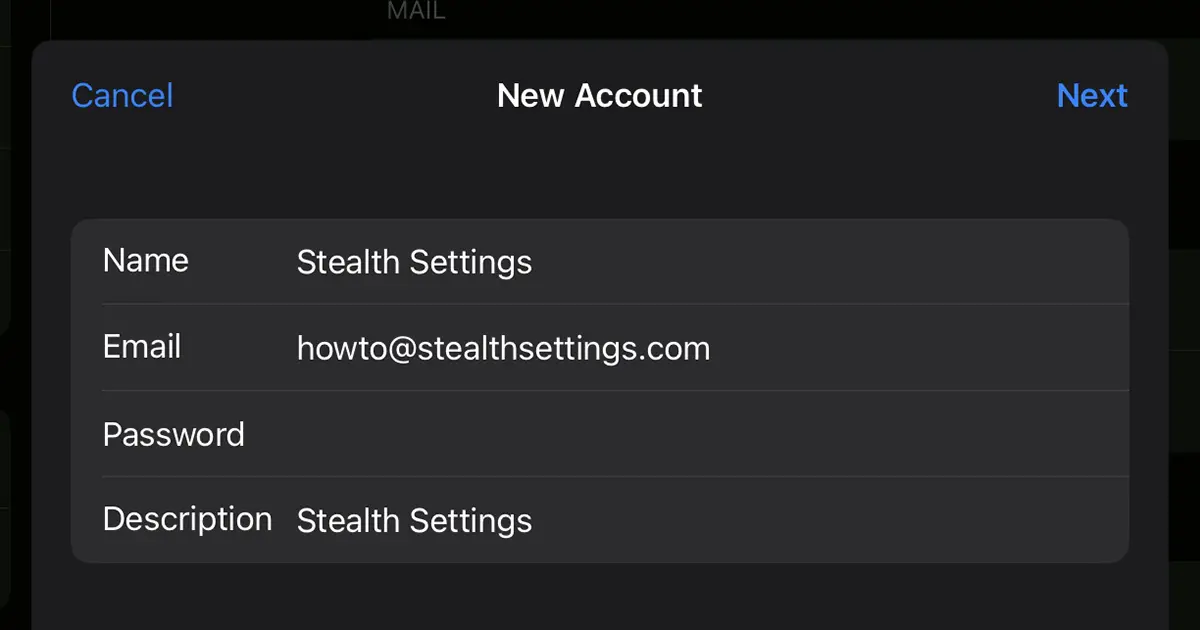
3. In the box that opens, add the data for the new email account, then press on “Next“.
4. In account, you have to choose what protocol you want to use for the messages received. IMAP or POP (See here what the difference is) and set the shipping and receiving messages servers.
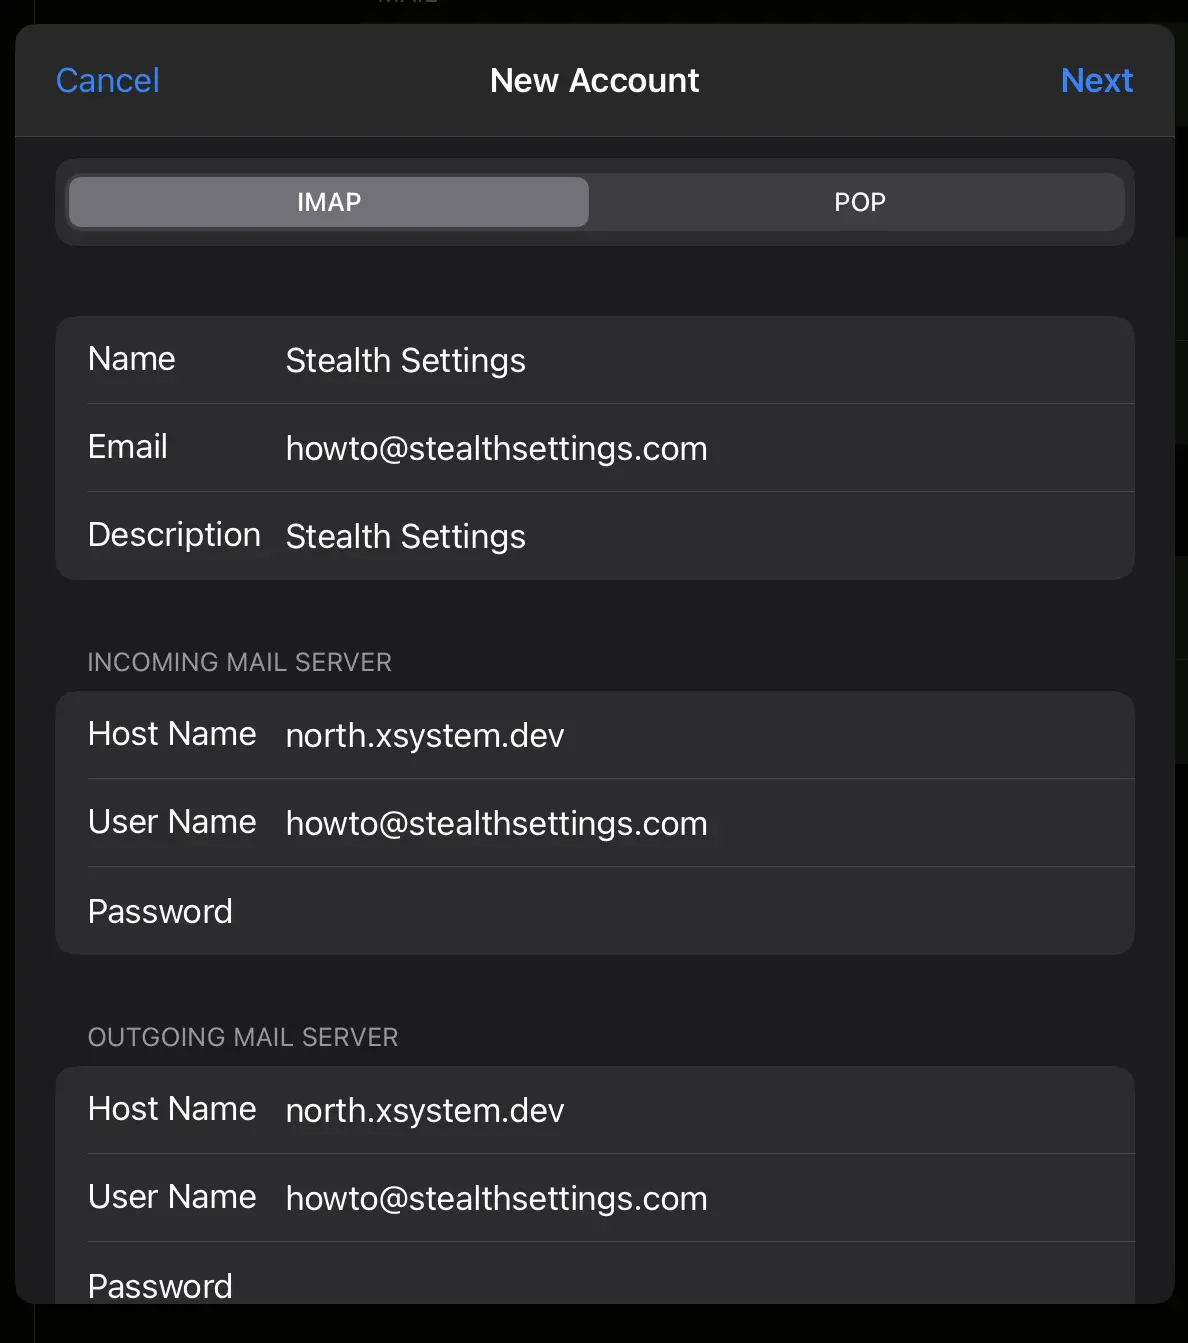
hold Next After you make sure that you have entered all the authentication data to the email server and wait until the verification is done.
Related:
- How do you add a private email account in the Mail application on Windows 11 - POP/IMAP and SMTP settings
- What are the differences between pop3 and IMAP? But SMTP?
Some services offer besides Mail and the possibility of synchronization Note, Contacts or Calendar. Choose the options that interest you to add them on the iPhone or iPad, then press “Save“.
This way you have succeeded add an email account on iPhone or iPad. Go to the application Mail and you can ship the first message of “test” To make sure everything works well.
You may also be interested in...
