
Many of us had to develop a presentation work in which images had to be integrated in the text. In the following we present the stages to follow to make a text with text and beautifully integrated images.
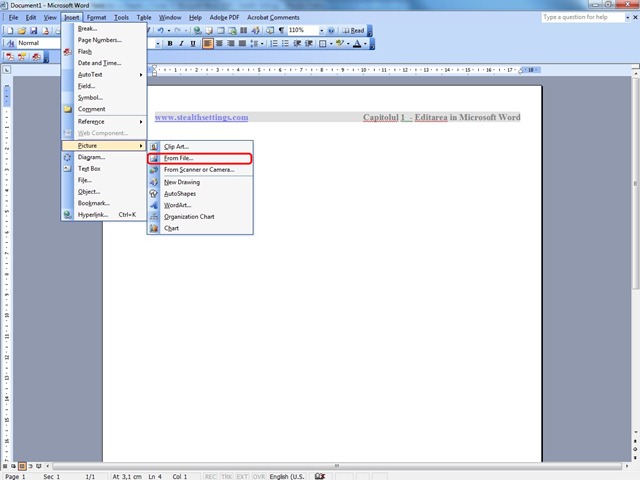
For this we technically write the text of the work and then select from the tab Insert – Picture – From file, The image we have saved on the computer and we want to integrate it into the document.
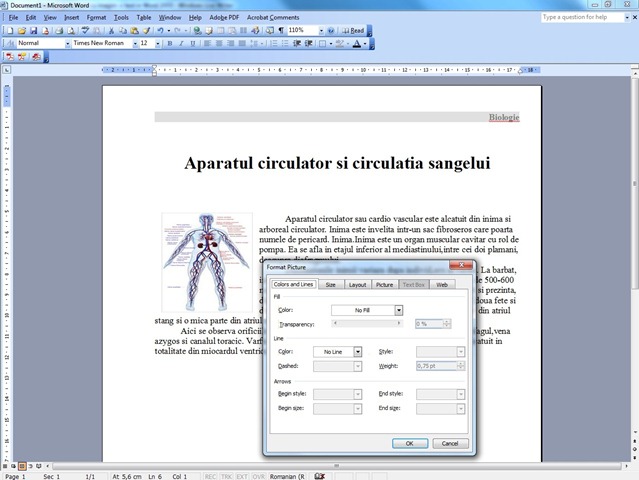
After we integrated the image in the document we will have to establish its position towards the text and its dimensions. This is done with double click on the picture Format Picture, Where the dimensions of the image can be defined, the border, the position towards the page and the text.
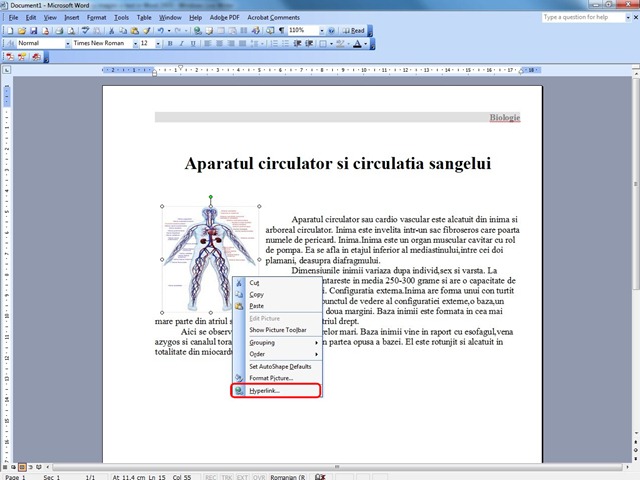
Changing the size of the image can be done by pulling with mousethe edges marked with image circles, for a easier perspective on page orientation.
Also an image can be attached to an Hyperlink to another page in the document, to E-mail or to a site with more information about the image, selecting the option Hyperlink right click on the image.
The images inserted in the document will be integrated in it, their original files are still needed. It is recommended that they be resized at lower resolution, in order not to load the document (when dozens of images in the document are needed).
You may also be interested in...
