Macos is a very stable operating system, which provides support for any user activity. However, you sometimes need to have Windows operating system at hand. In this tutorial you will see step by step how you can install Windows 11 on Apple Silicon with VMware Fusion.
So, if you want to meet the Windows 11 operating system on IMAC devices, Macbook with Apple Silicon architecture, such as those equipped with M1, M2, M3 processors, the steps from the guide below will help you.
How to install Windows 11 on Apple Silicon with VMware Fusion
To start, you need to get the Windows 11 ARM image from Microsoft. You will notice that when you download it, you will get a .VHDX (hyper-v) file, incopatible with VMware, which can be converted by executing in the terminal the command line below:
/Applications/VMware\ Fusion.app/Contents/Library/vmware-vdiskmanager -r ./Windows11_InsiderPreview_Client_ARM64_en-us_22598.VHDX -t 0 ./Windows11.vmdkAs can be seen, the VdiskManager tool from VMware is used for conversion.
This command line will turn VHDX into a VMDK (a format you can also open in virtualBox), with the help of the Vdiskmanager instrument.
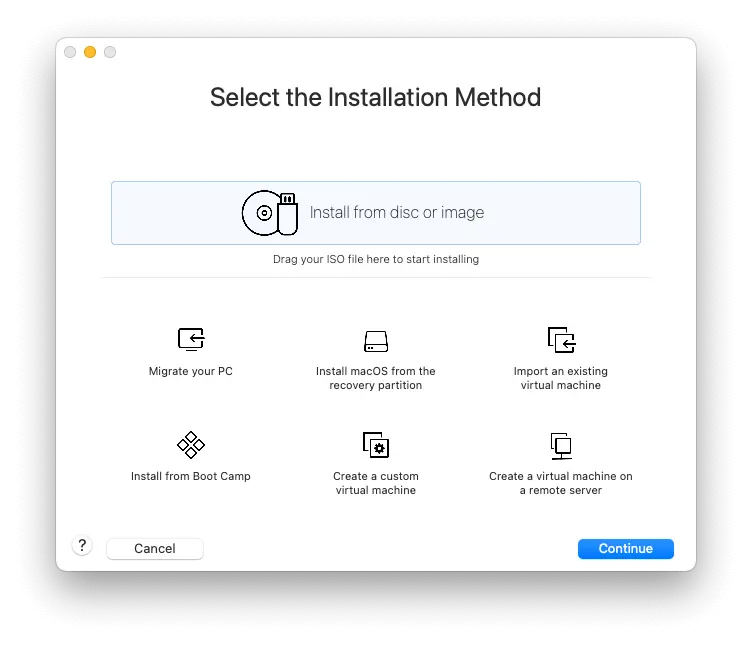
Once this process is completed, start VMware and then create a new virtual machine (VM). Then select “Create Custom Virtual Machine“.
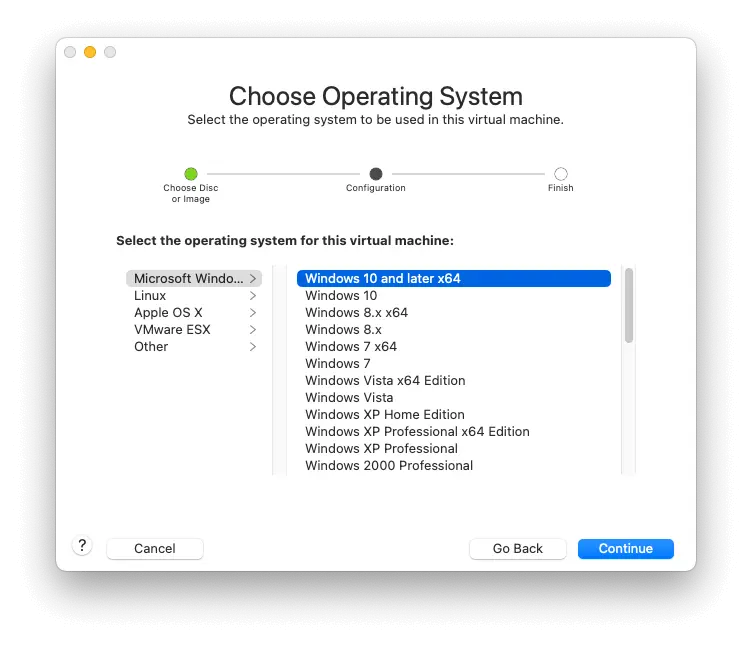
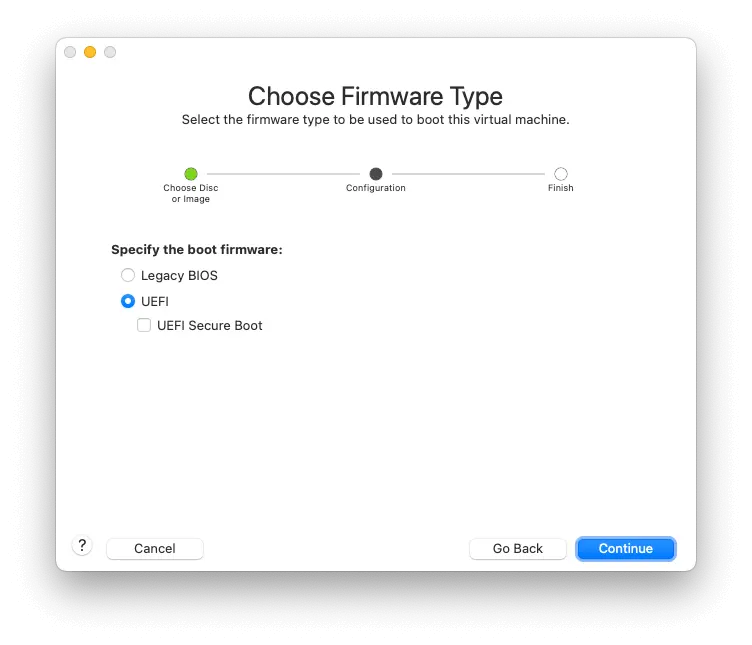
Select Windows 11 ARM As an operating system, then don't forget to tick the box “UEFI Secure Boot“.
Set a password then go to get the picture VMDK ca disc virtual (Virtual Disk).
When selecting, don't forget to choose “Make a separate copy of the virtual disk. ”

Complete the operation and open VM (Virtual car) with Windows 11 ARM on Mac Silicon.

The problem is that VMware has no network support in this image. So you will need to install Windows without network support. When you are at this step (or before) press the key combination SHIFT + F10 (If you have a Mac keyboard, you will need to press Fn + F10). This will open a terminal in which you enter your line below:
OOBE\BYPASSNROThis will activate the possibility to install Windows 11 without network support and restart the installation.
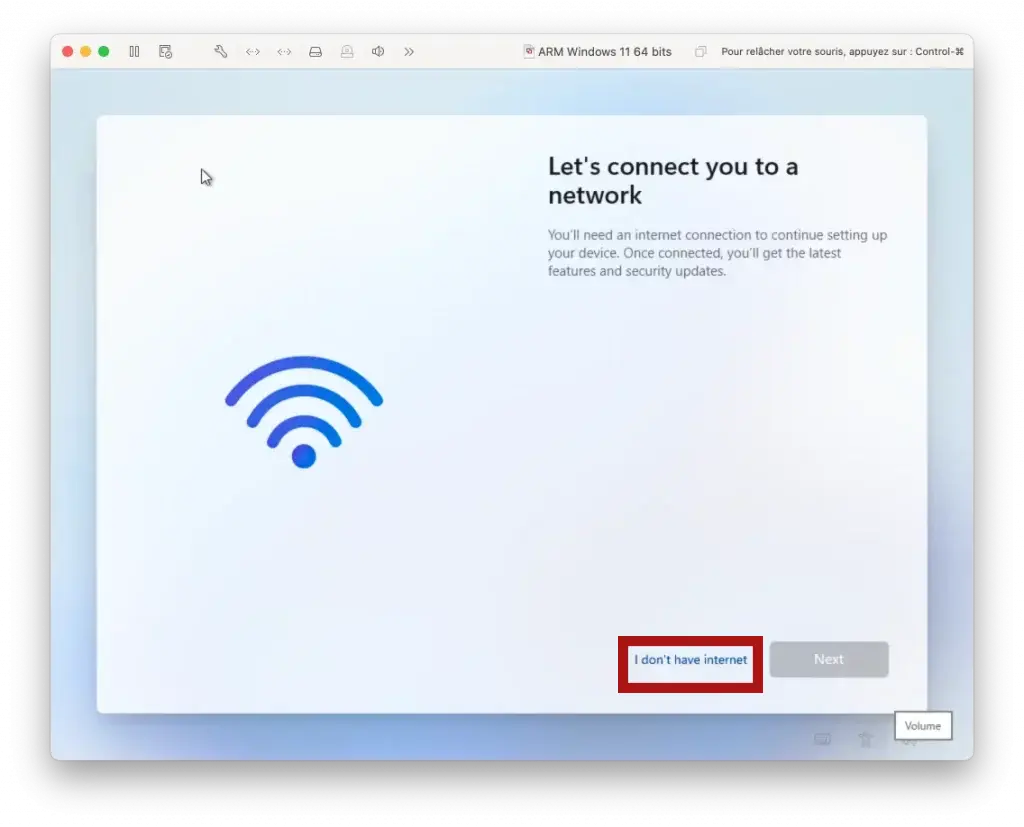
Click pe “I don’t have Internet“.
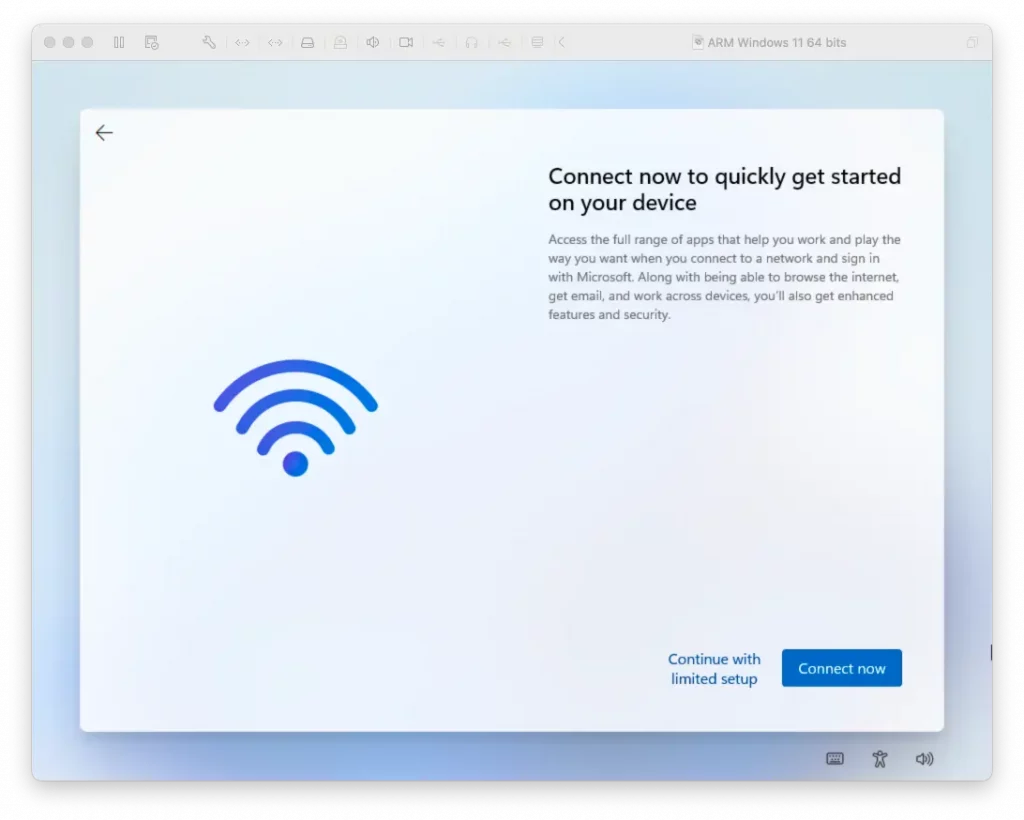
Click pe “Continue With Limited Setup“.
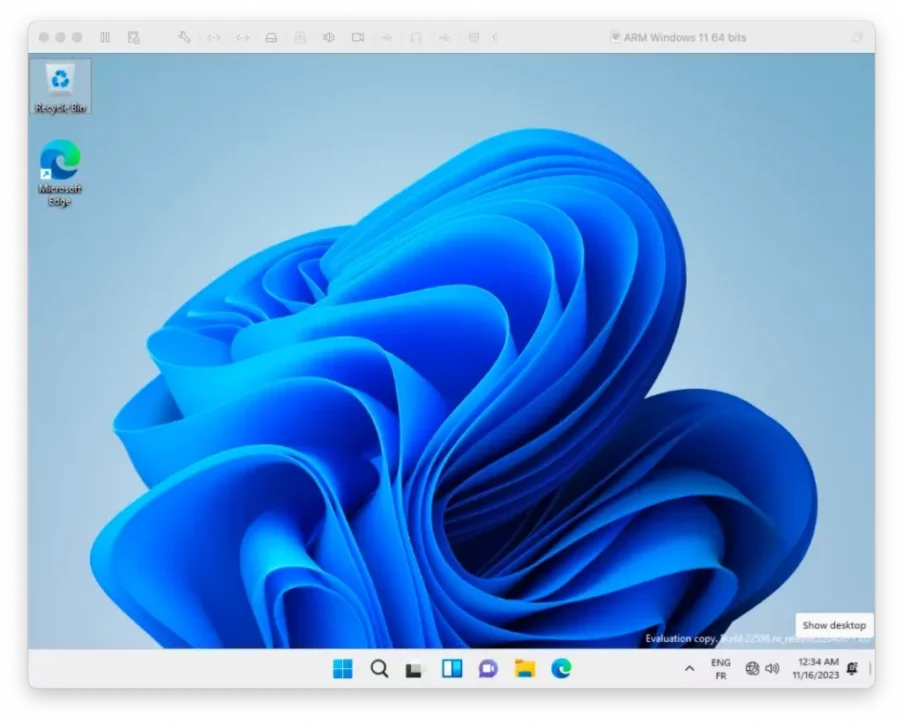
Next, after you have been able to follow the steps to install Windows 11 on Apple Silicon with VMware Fusion, you will have the operating system, but without internet connection.
To solve the problem of internet connection, open Powershell with admin privileges, then execute the command line below and press “A” for “Yes to All“:
Set-ExecutionPolicy RemoteSigned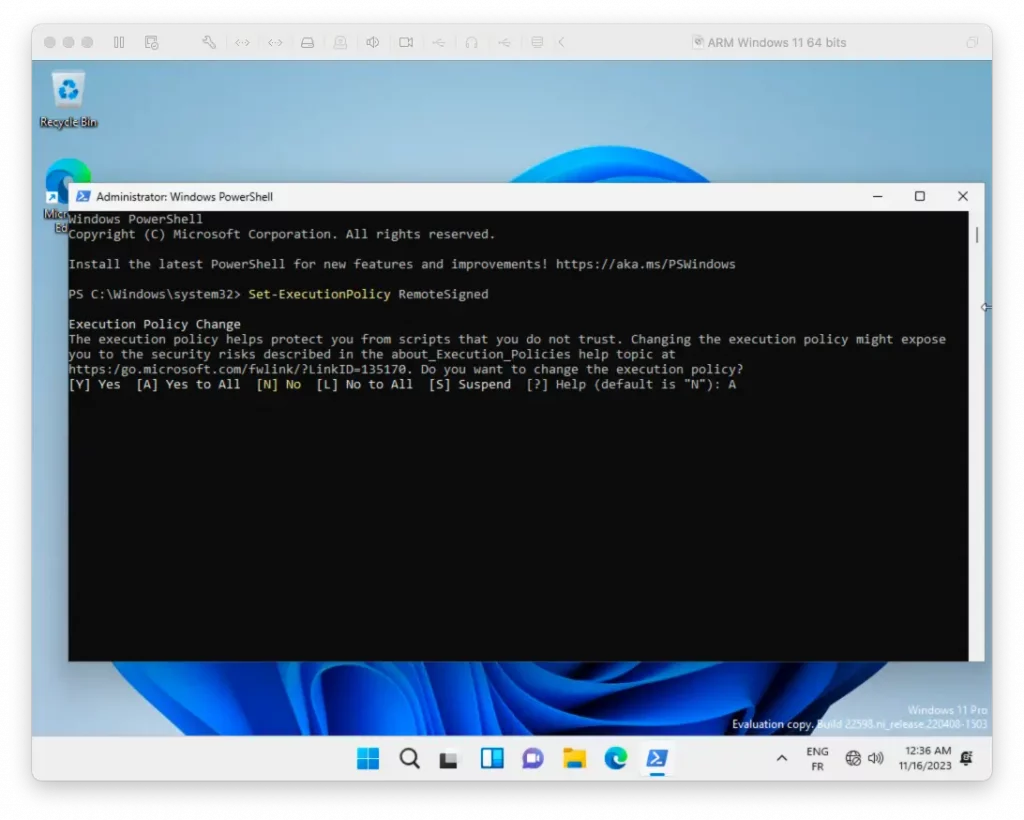
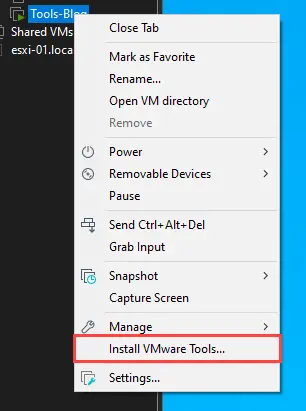
Then all you have to do is install “VMware Tools” through the menu VMware.
Related: How can you install Windows 11 on Mac (Intel) computers – Not Meet the Minimum Hardware Requirements
Restart Windows operating system for everything to work normally. You will have Windows 11 on Apple Silicon Perfect Functional.
You may also be interested in...
