Add Take Ownership to the click-right menu in Windows 7
Modification/editing system files in previous versions of Windows was (and is still for those who still use XP or older versions of Windows) a somewhat simple task. But with the launch Windows Vista, Microsoft has increased security the operating system, and in Windows 7 It became even stricter. Granting Administrative permissions (take ownership) on a system protected by the system is a process that pope some time to be completed, whether it is achieved by Gui interface or with the help Command prompt.
content
Fortunately there is a small (well, not really small, but it is performed only once: p) register hack which adds the option Take Ownership In the click-right menu, so after its realization, whenever you have to grant Administrator rights On a system file it is enough to give two clicks and ready, the problem is solved.
How can we add Take Ownership to the click-right menu using the registers
Careful! Before changing system registers is recommended to make a back-up their to avoid unpleasant consequences.
- open the register editor (taste regedit in Search-ul FROM Start Menu And give Enter) and navigate to the way HKEY_CLASSES_ROOT*shell
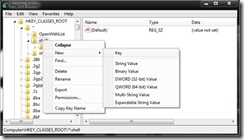
- sub shell Create a new key you are called speech
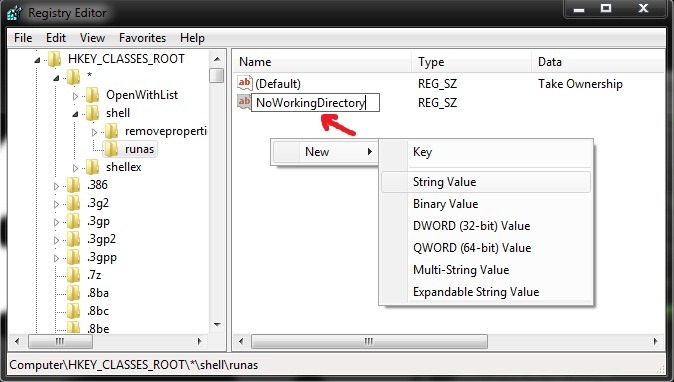
- In the right -hand panel change the value of the entrance Default in Take Ownership, then create a new string entry, which you call it NoWorkingDirectory (and to whom you give no value)
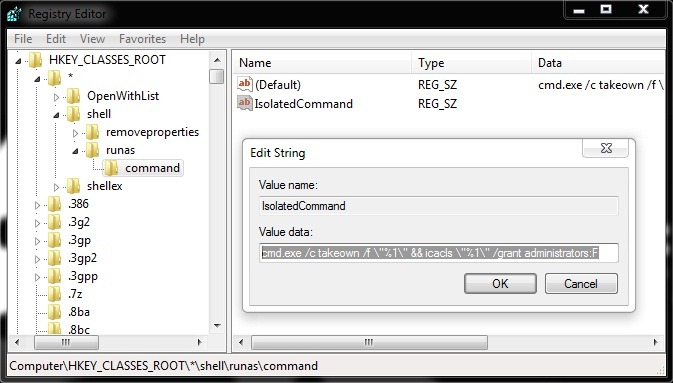
- sub speech Create a new key you call you command
- In the right panel give double-click on the entrance Default Then enter the following row in the field under below Value
- cmd.exe /c takeown /f “%1” && icacls “%1” /grant administrators:F
- Then create a new String Value entry you are calling IsolatedCommand, to whom you will give all the value cmd.exe /c takeown /f “%1” && icacls “%1” /grant administrators:F
- browse the path HKEY_CLASSES_ROOTDirectoryshell and create a new key you call you speech
- In the right -hand panel change the value of the entrance Default in Take Ownership, then create a new string entrance you call NoWorkingDirectory
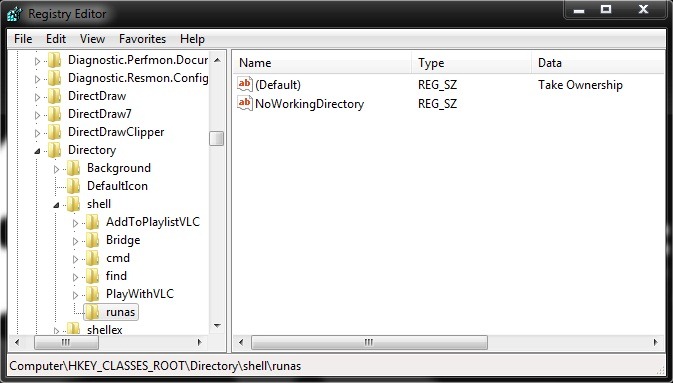
- sub speech Create the key commandThen in the right panel change the value of the entrance Default in
- cmd.exe /c takeown /f “%1” /r /d y && icacls “%1” /grant administrators:F /t
- Create the entrance again IsolatedCommand, to whom you give the same value with the entrance Default (I mean cmd.exe /c takeown /f “%1” /r /d y && icacls “%1” /grant administrators:F /t)
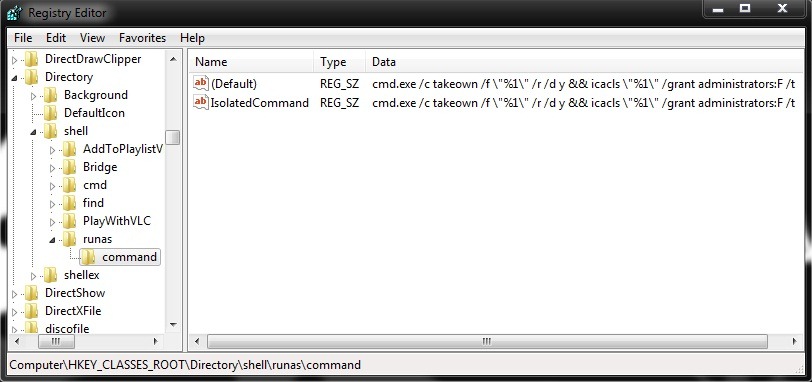
- Then close regedit
You will notice that in the click-right menu a new option appeared- Take Ownership - which allows you to grant administrative rights over any system protected by the system.
For those who are not used to work with registers, they can download and use the two files .reg below:
InstallTakeOwnership.reg
UninstallTakeOwnership.reg
Note: Tested on Windows 7. Compatible with Windows Vista.
Add Take Ownership to the click-right menu in Windows 7
What’s New
About Stealth
Passionate about technology, I write with pleasure on stealthsetts.com starting with 2006. I have a rich experience in operating systems: Macos, Windows and Linux, but also in programming languages and blogging platforms (WordPress) and for online stores (WooCommerce, Magento, Presashop).
View all posts by StealthYou may also be interested in...


2 thoughts on “Add Take Ownership to the click-right menu in Windows 7”