
Compared to the MacOS operating system developed by Apple, which can only be installed on Mac, Windows is a little more flexible and can be installed on almost any computer. Including Mac. Including here iMac, Mac mini, MacBook, MacBook Pro, MacBook Air. The condition is to have one Intel processor, Minim 55 GB Free space on the hard and the device-in-wing model not to be older than 2012. These would be the most important requirements To install Windows on a Mac. You must be aware that Installing Windows on Mac It is not done in the same way as on a normal PC and You can't quit the maccos operating system. After installation, Windows will run on Mac as a self -operative operating system. You will be able to install specific Windows applications, games, you will be able to customize it and you can do all the operations in the same way as a normal PC.
Complete Installation Installation Windows on Mac (MacBook, Imac, Mac Mini, Mac Pro)
First of all, you must make sure you have a minimum 16 GB USB flash drive, at least 50 GB free on the MAC hard drive, the .iso of Windows.
1. Go to the Microsoft website and download the latest version of Windows on 64-Biti.
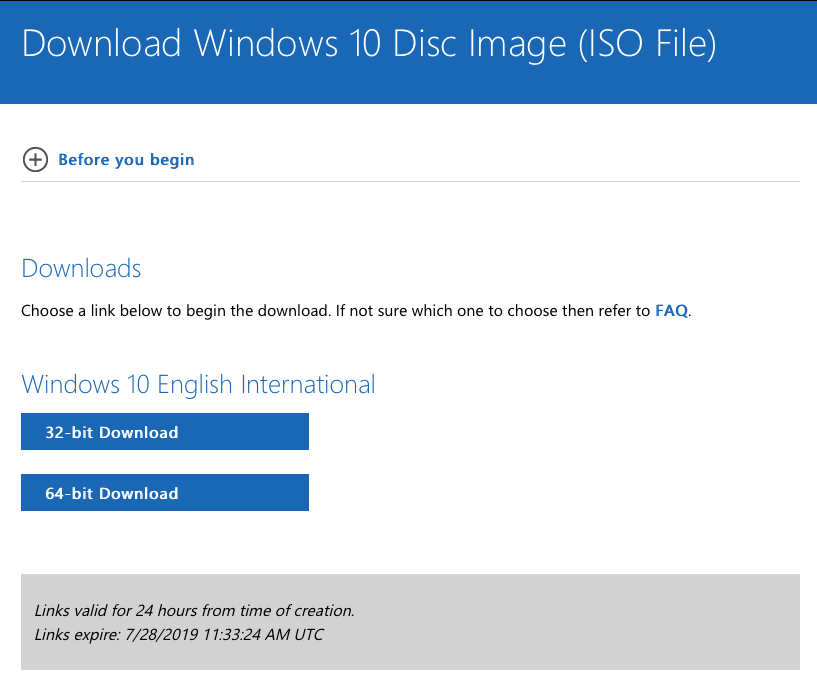
2. Copy the file with the .iso image of Windows on the flash drive.
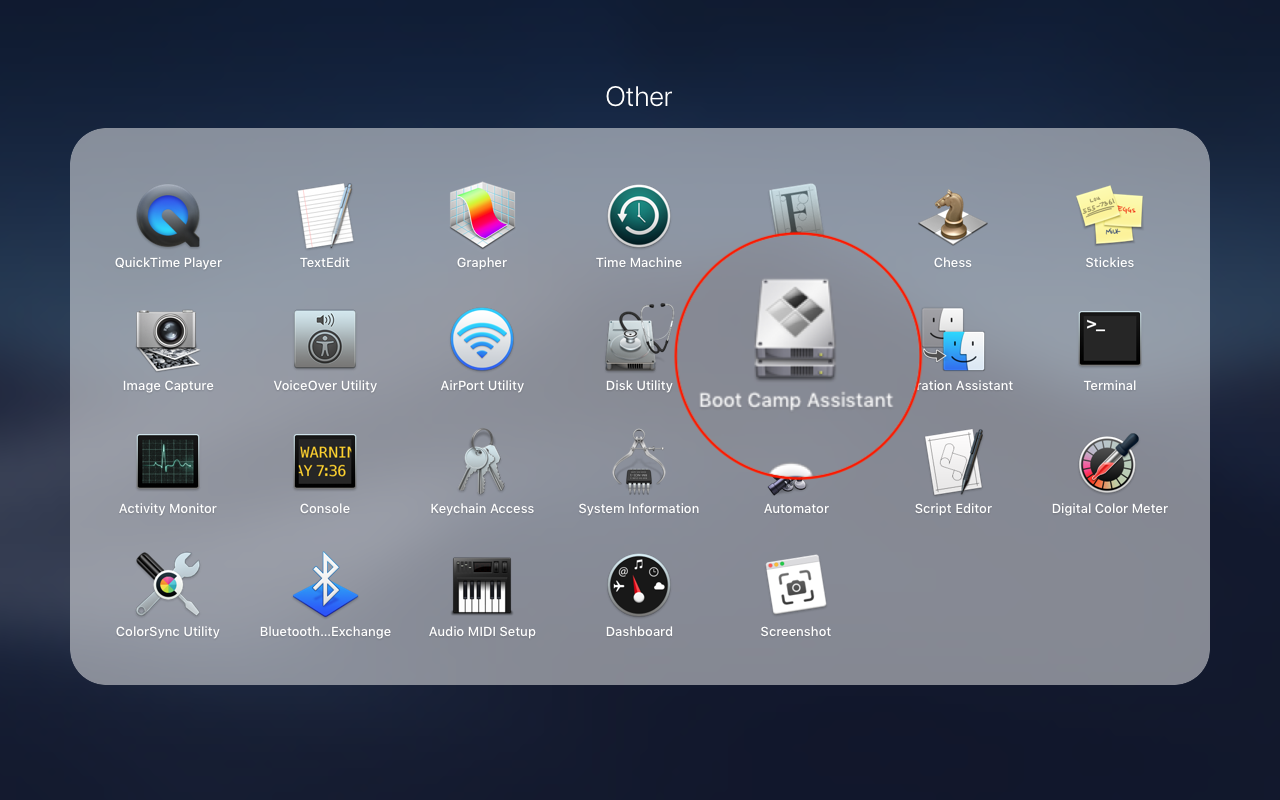
3. Open Mac and go to Launchpad the “Other”, where do you open from Boot Camp Assistant.
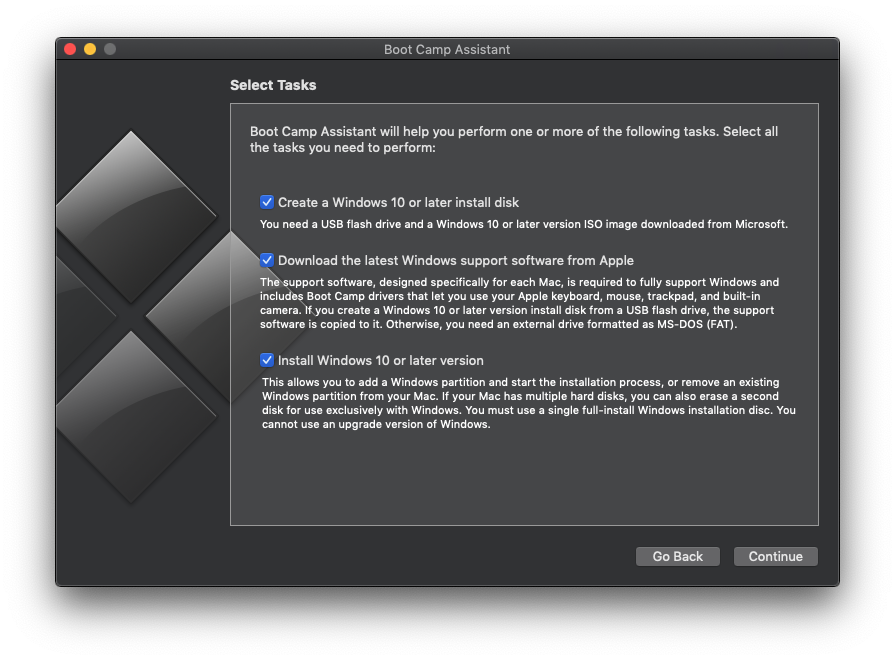
4. In Boot Camp Assistant click “Continue” in the first screen.

5. At the next screen, let all 3 options checked. If you already have a flash drive with the bootable image of Windows, Defature “Create a Windows 10 or later install disk”. This option will practically make a bootable flash drive 10. Click “Continue”.
6. Select Flash Drive as Destination for Windows installation files. In our scenario it was selected by default because a single external drive was connected. Click “Continue”.

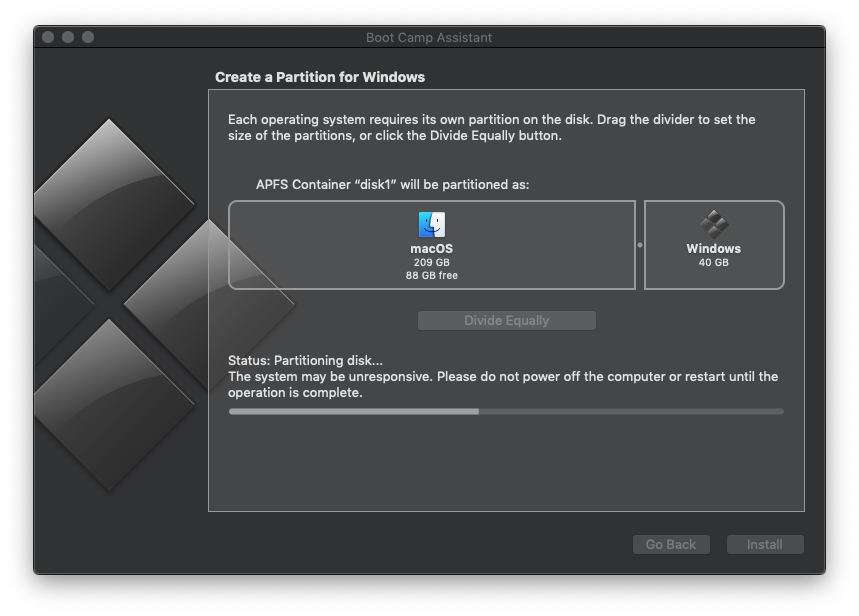
7. The next screen will create the partition for the Windows operating system. Pulling with mouse of the place indicated in the image below you can enlarge or reduce the Windows partition.
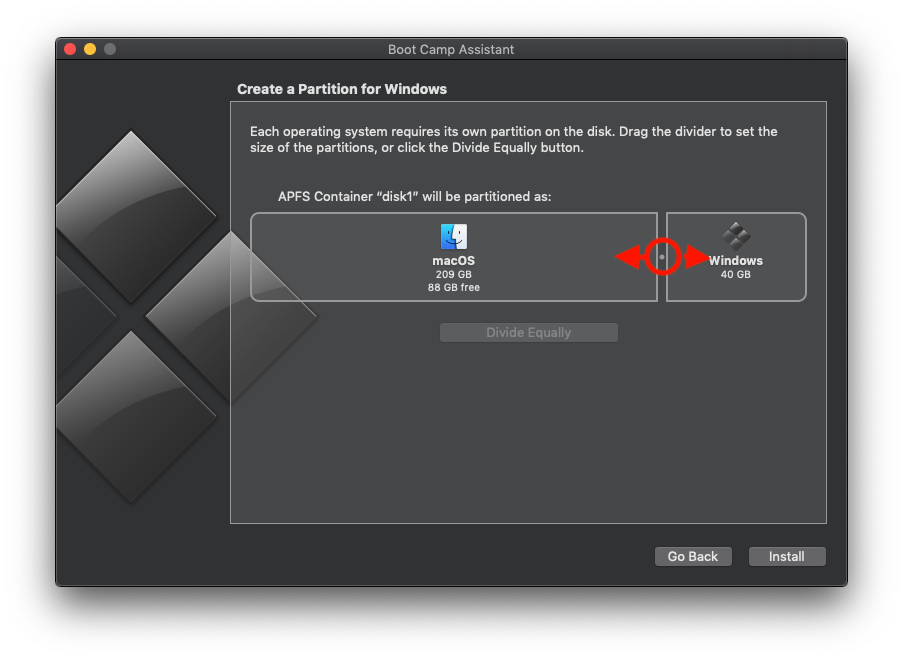
8. Click “Install” and start the process of hard partitioning and Windows installation.
Next, you will follow the Windows installation steps, just like a Windows PC. In the end you will have two independent operating systems on MAC. Macos and Windows.
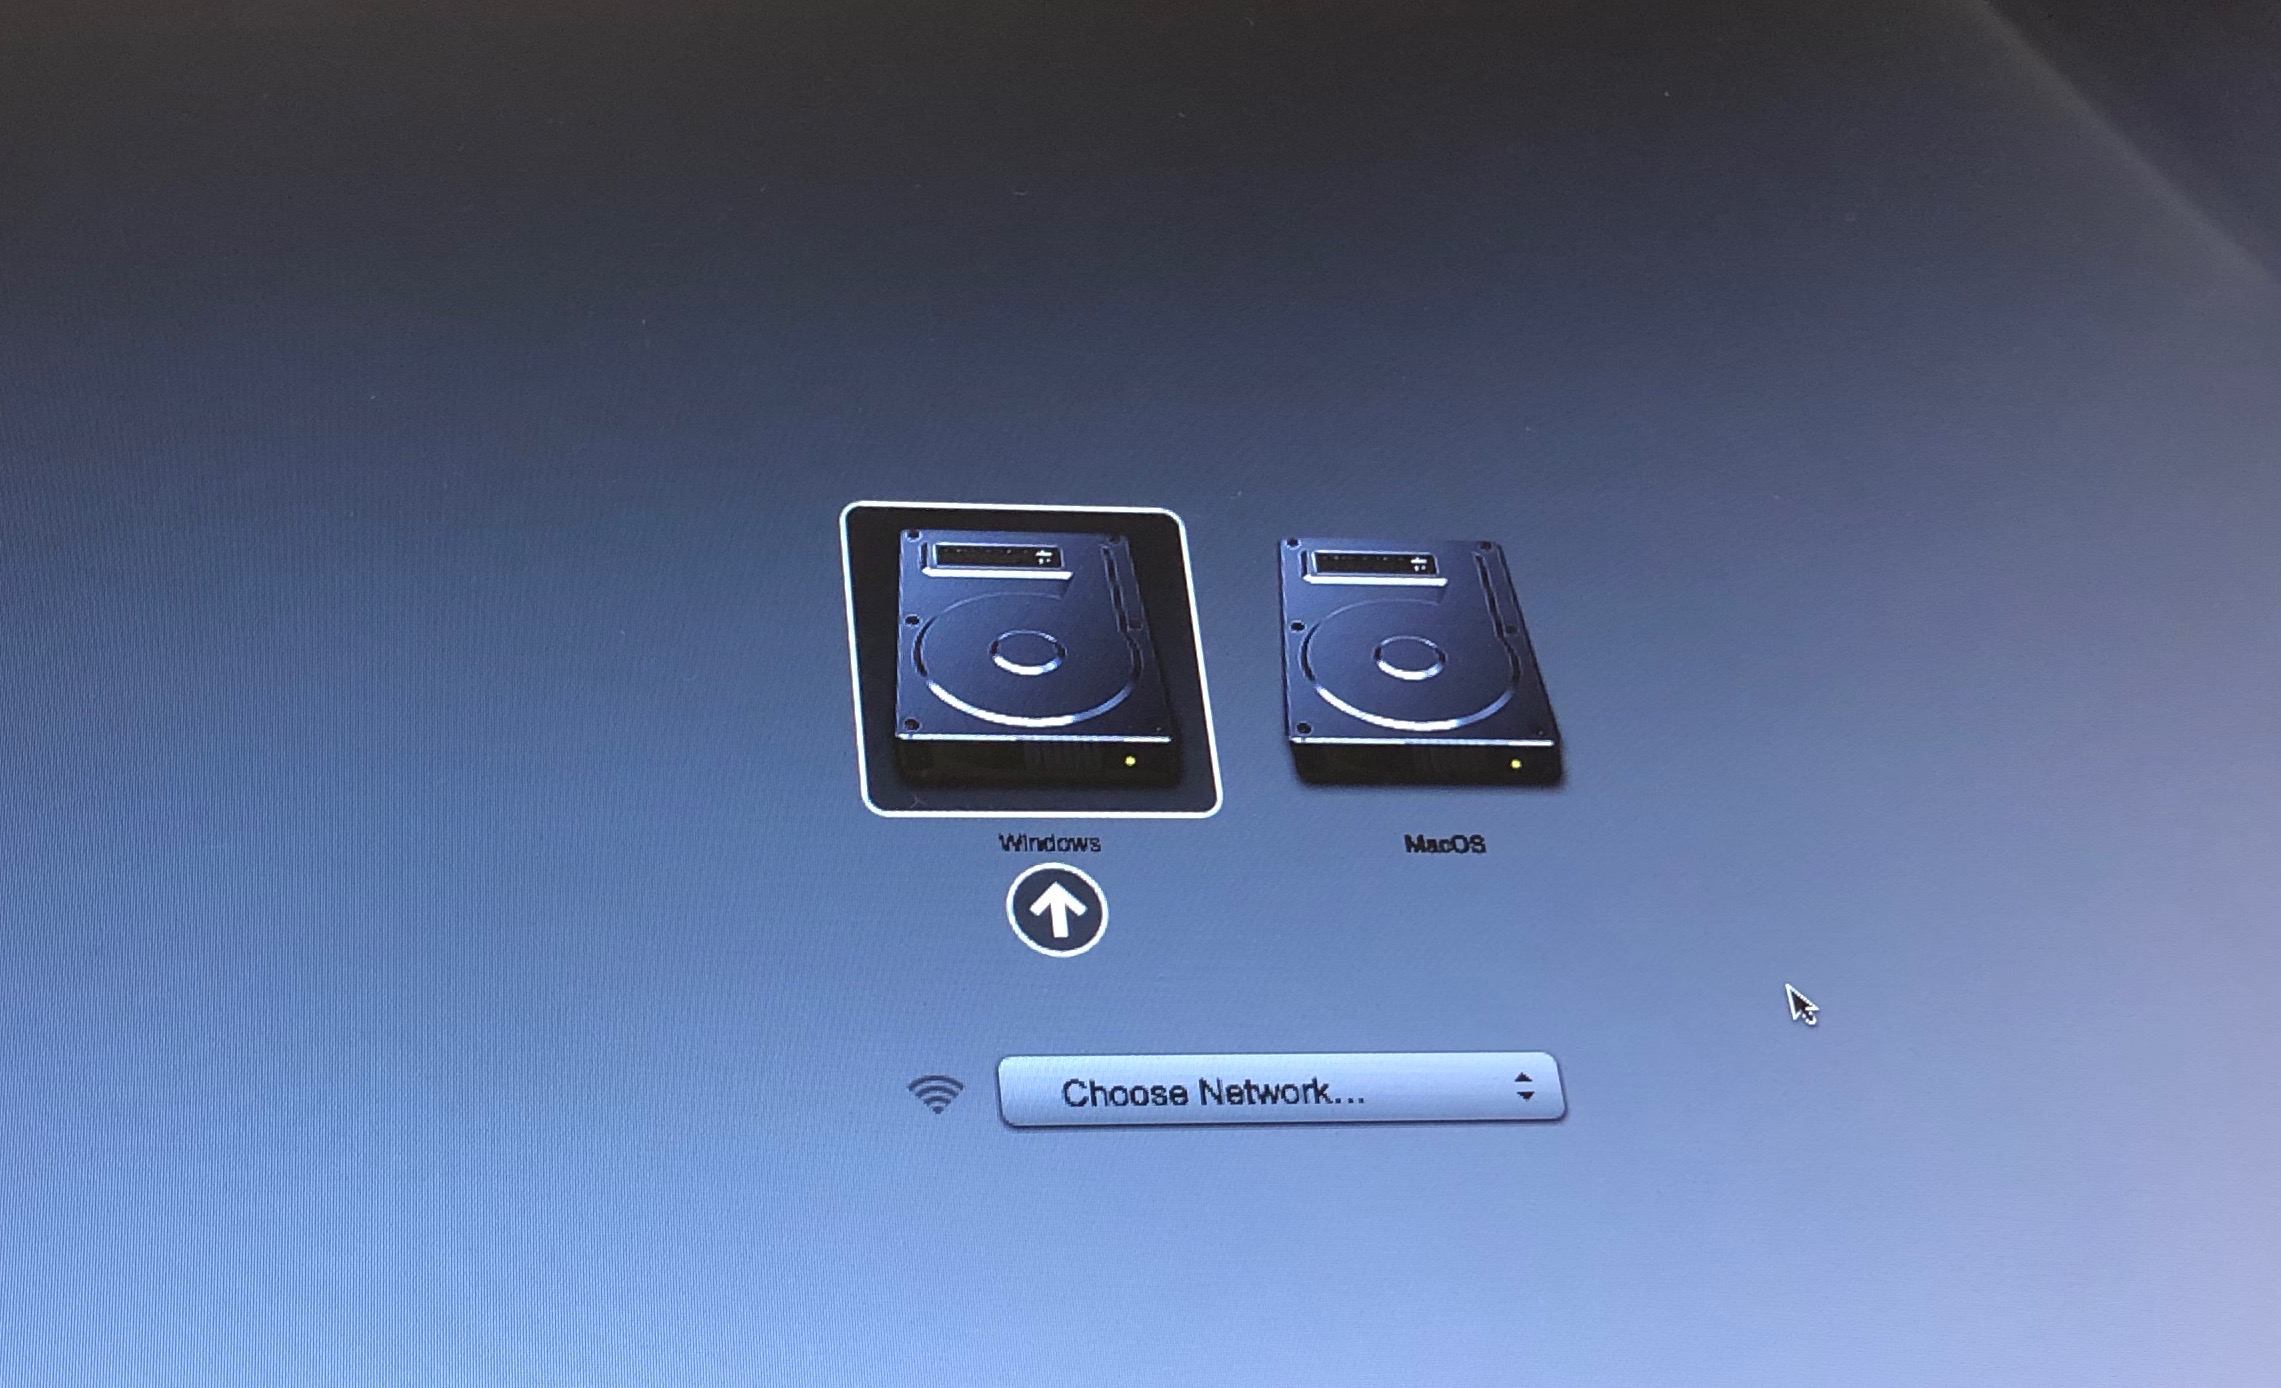
Tinanad pressed the key “Options” Immediately after starting Mac, you can choose which operating system to start.
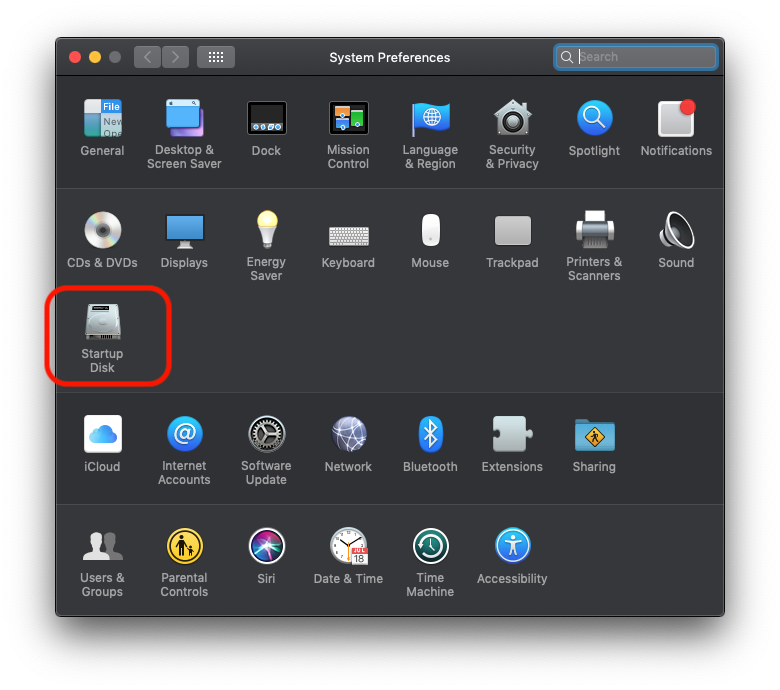
You can set Mac to start by default on Windows or Macos, from System Preferences (PE MacOS) →Startup Disk.
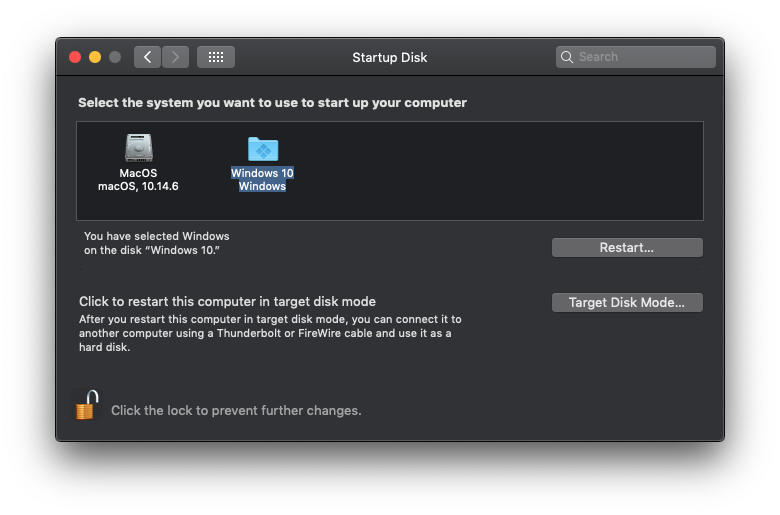
In “Startup Disk” Click the lock of the lower left and enter the system password to unlock the options. Then select one of the two operating systems, which you want to run automatically when starting Mac.
In this tutorial I showed you step by step how the latest version of Windows on Mac is installed. Windows 10 on one MacBook Pro 13-inc, MID 2012 with 8 GB DDR3 RAM at 1600 MHz, 2.5 GHz Intel Core i5 processor and 256 GB SSD.
If you have questions and can help you with something, do not hesitate to leave comments.
You may also be interested in...

One thought on “Complete Installation Tutorial Windows on Mac (MacBook, Imac)”
On McBuk 2006 can 10 kata be installed