Disable & Clear DNS Cache – Windows 7, Vista & XP

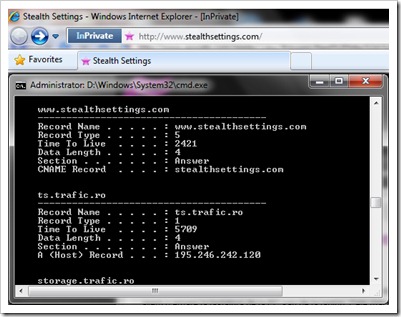
Chair if we use the new technology “InPrivate” a Internet Explorer 8 or “Private Browsing” a Google Chrome, which should not store any information after browsing the web sites, here is something remains in the PC. DNS Cache-ul.

To see DNS cache is enough to open Command Prompt If you tasted:
ipconfig /displaydnsClear, Reset or Flush DNS Cache in Windows Vista, Windows 7 si Windows XP.
Tast you in Prompt Command :
ipconfig /flushdnsYou will receive the message:
Windows IP Configuration
Successfully flushed the DNS Resolver Cache.
In Windows Vista and Windows 7 you will have to open cmdwith Administrator privileges to delete DNS cache.
Stop DNS Cache (method valid on all operating systems)
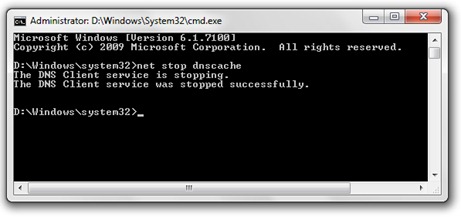
To stop DNS Cache Open Command Prompt and write the following order line:
net stop dnscache
Or series of software-uri antivirus and firewall offers you from the installation phase the option of a dezactiva dns cache, and internet browser Mozilla Firefox will provide you with an add-on through which you can activate / deactivate DNS cache with a single click.
Allows you to disable and enable the DNS Cache of Firefox:
https://addons.mozilla.org/en-US/firefox/addon/5914
*To get an idea of DNS Cache and DNS Cache Poisoning, I found a very good article on wikipedia.
Disable & Clear DNS Cache – Windows 7, Vista & XP
What’s New
About Stealth L.P.
Founder and editor Stealth Settings, din 2006 pana in prezent. Experienta pe sistemele de operare Linux (in special CentOS), Mac OS X , Windows XP > Windows 10 si WordPress (CMS).
View all posts by Stealth L.P.You may also be interested in...


2 thoughts on “Disable & Clear DNS Cache – Windows 7, Vista & XP”
You have helped me a lot for the most useful years! Thanks!
you are welcome ;-)