What do you need to know about the autofit function in Excel (columns and rows)

In this tutorial you learn to work with the AutoFit function in Excel. How to change columns and rows. What you need to know about the AutoFit function in Excel.
content
Although Microsoft Office Excel it is used on a very large scale, a large part of those who use it only know elementary functions of him. To those who are counted among Excel users not very advanced and who waste precious time every day adjusting manually different files created with this software, we hope to make their work easier getting to know them with the function AutoFit.
What you need to know about the AutoFit function in Excel
Whenever we have to create tables in Excel, depending on the data we enter in their cells, we must adjust width and height them so that the information is visible and easy to understand by those who requested (or those to whom they are "intended" :D) the respective tables. In general, adjusting the "papa" tables takes a bit more time than "filling" them with information. The simplest method to avoid this and save time (and nerves) is to use it the AutoFit function (of which - unfortunately - a very large part of Excel users have not heard). This function (as you can easily imagine), automatically change the height of the rows and the width of the columns in MS Excel so that the creation of tables or elaborated files will no longer represent a chore for those who, before learning about AutoFit, were wasting good minutes just adjusting them.
- How we change the Power button function in Windows Vista (Sleep or Shut Down)
- How to make a chart based on a table in Excel 2010
However, before using the AutoFit function, we must take into account a few important things:
- there are limits to how big or small we can make the columns and rows of Office Excel. The width limit of a column is 225 characters (face of 8.43 what is the default value) and the height limit of a row is 545 pixels (face of 20 pixels).
- modification FONT, of its size, or the use of features such as bold or italic decreases the number of characters that can enter a cell
- columns with a width value equal to 0 are not displayed in the Excel sheet. The same is valid for rows with height value = 0 (equivalent to using the function Hide)
How can we access the AutoFit function in MS Excel
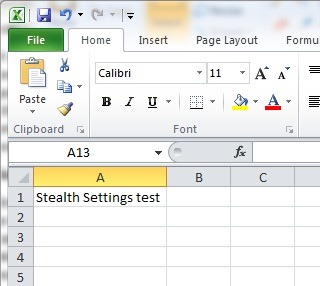
When we enter more characters in a cell than the default value of a column allows, Excel allows the expansion of the information entered in the adjacent columns (immediately following the one in which they were entered).

To avoid this, we must adjust the width of the respective cell so that the entire information is contained in a single cell. Of course, the adjustment can be done very simply and manually, but if it is necessary to create a table in which various other information must be entered - obviously, in different rows - the adjustment of each individual cell becomes irritating.
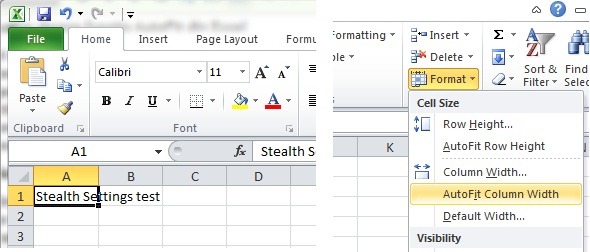
In order to automatically adjust the width of a column we will first have to select the cell that contains the information according to the length of which we want to adjust the respective column,

then click on the tab at the top of the Excel sheet Home > Format And we select AutoFit Column Width. The column will be immediately adjusted depending on how many characters the information typed in the respective cell contains.

If you later decide for various reasons return to the default value of the column, go all the way to Format and click on Column Width, then enter the default value (8.43) and click OK (option Default Width it does not change the width of the column in the default one, but change the default value of the width of a column (for example, change the default value of a column from 8.43 to any other value, such as 43.8, etc.).
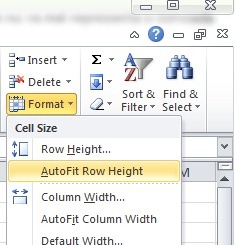
Considering that Excel automatically changes the height of the cells in a row depending on the font size, the function AutoFit Row Height it is not one of major importance as it is AutoFit Column Width.

But in certain cases – as sometimes happens when we give copy/paste information written with a larger font than the default one – the adjustment is not done automatically and it is necessary to use the function of AutoFit to change the row height.

Note: Even if Excel can seem too rigid or even boring in some cases, it is good to remember that it benefits from some very interesting functions that can turn the use of this software into a simple and fluent activity.
What do you need to know about the autofit function in Excel (columns and rows)
What’s New
About Stealth
Passionate about technology, I write with pleasure on stealthsetts.com starting with 2006. I have a rich experience in operating systems: Macos, Windows and Linux, but also in programming languages and blogging platforms (WordPress) and for online stores (WooCommerce, Magento, Presashop).
View all posts by StealthYou may also be interested in...


2 thoughts on “What do you need to know about the autofit function in Excel (columns and rows)”
This translation is simply horrible.
Please use the skills of a human translator who knows their French well and, obviously, the source language (probably English in this case).
Hello,
I’m very sorry for the inconvenience, but it’s almost impossible for me to hire a translator. The translations are done automatically by GT, but I’ll try to improve their quality, probably with AI.