
TeamViewer is definitely the most famous customer of “remote” from the distance between two PCs and for several months, even between them mobile phones.
Interaction options viaTeamViewer between two PCs there are many, but for weaker internet connections, functionality interruptions are frequent. Connection between two PCs via TeamViewer is made exclusively through the servers of the company that owns the application, and for remote management between two computers in the same local network (LAN), TeamViewer has better alternatives.
In our scenario we will use the application Microsoft Remote Desktop for MacOS, to us conecta in remote from one MacBook Pro on one laptop Lenovo with operating system Windows 10. Computers located in the same local network. Local Area Network.
The first step is his we configure Windows 10 for Remote Desktop connections. By default, for security reasons, this option is disabled on Windows 10.
How we activate the option “Remode Desktop Connection” pe Windows 10
1. Open the Control Panel on Windows 10, and type in the search box (top-right). “remote”.
2. In the list of options that appears, click on “Allow remote access to your computer“.
3. Under the field “Remote Desktop” of the options box, bifam: “Allow remote connections to this computer“, then check the recommended option below it.
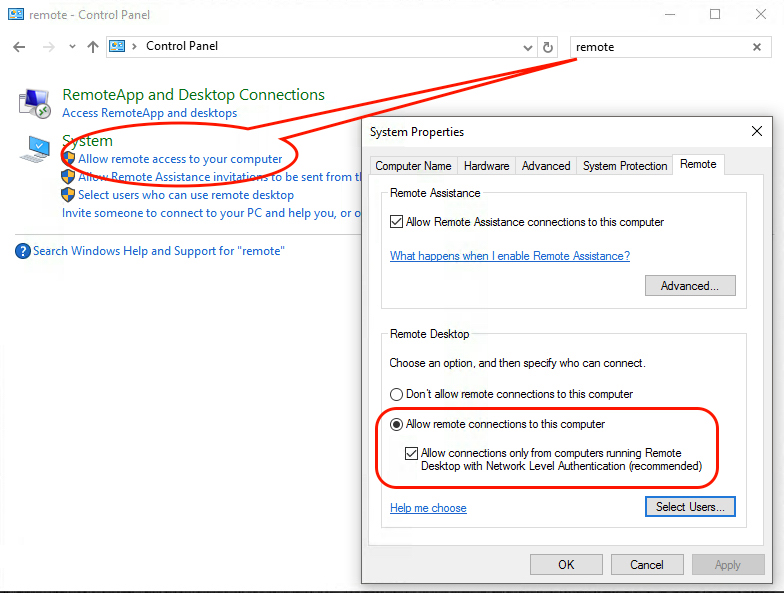
After making these settings, click on “Apply” and “Ok” to save the changes. Connections are now accepted “Remote Desktop” on the PC with Windows 10.
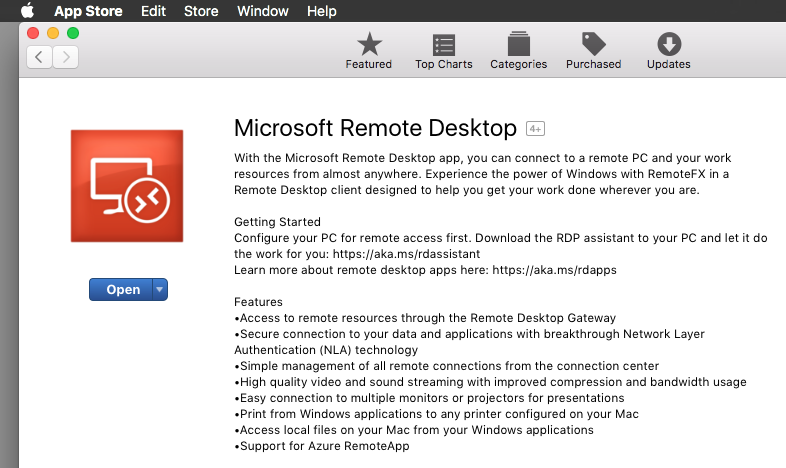
Download, Install and Configure Microsoft Remote Desktop on macOS Sierra
We need to installMicrosoft Remote Desktopto connect to the Windows PC in the LAN.
We go in App Store and we were looking for the application “Microsoft Remote Desktop“.O remove it if you install it like any other application in the App Store.
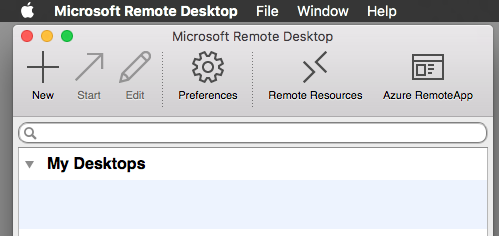
Once installed, open the application “Microsoft Remote Desktop” FROM Launchpad, then we configure the connection for the laptop with Windows 10.
1. Click “New” to add a new connection
2. Fill in all the fields with the connection data:
Computer name: pass a name of the LAN computer for which you are setting the connection. This name can be chosen to your liking.
PC name: here either pass the exact LAN name of the Windows PC, or directly pass the LAN IP.
Gateway: remains unconfigured.
Credentials: pass your Windows 10 username and word related to the user you are connecting to. In most cases, this is the Microsoft account.
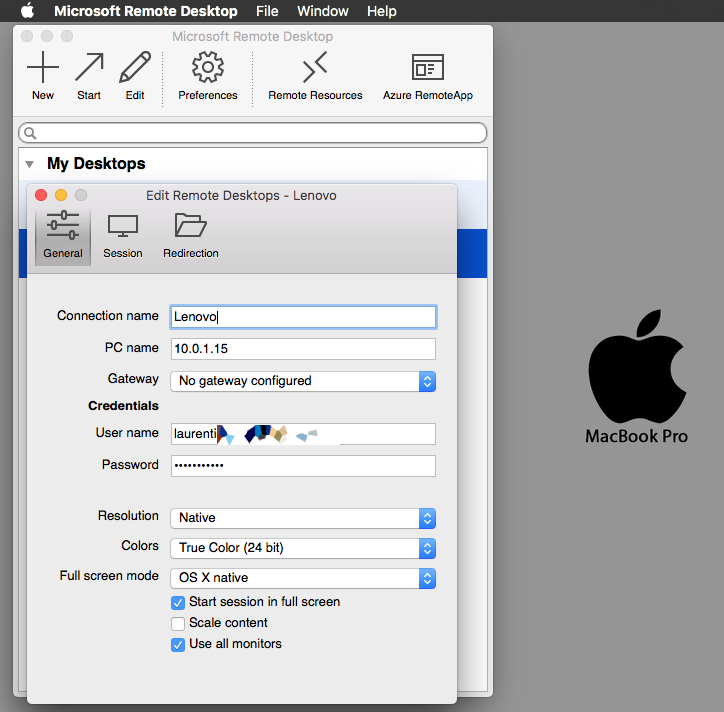
The rest of the settings belong to resolution and display. You can configure them according to your system and how you want the remote image to be displayed Windows PC pe macOS.
After completing these settings, you are ready to connect in remote full control to your Windows 10 PC on macOS.
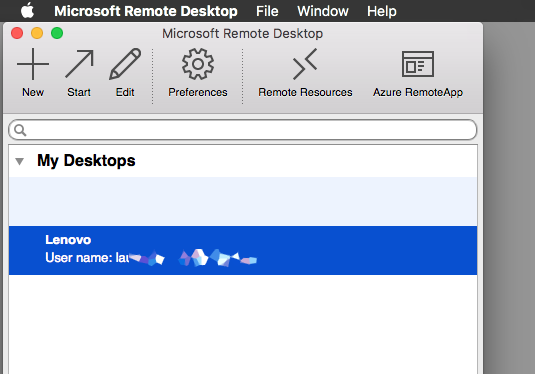
Double-click on the saved connection and wait for Windows authentication.
Here's how it looks in the screenshot of the connection to Windows 10, from macOS Sierra:
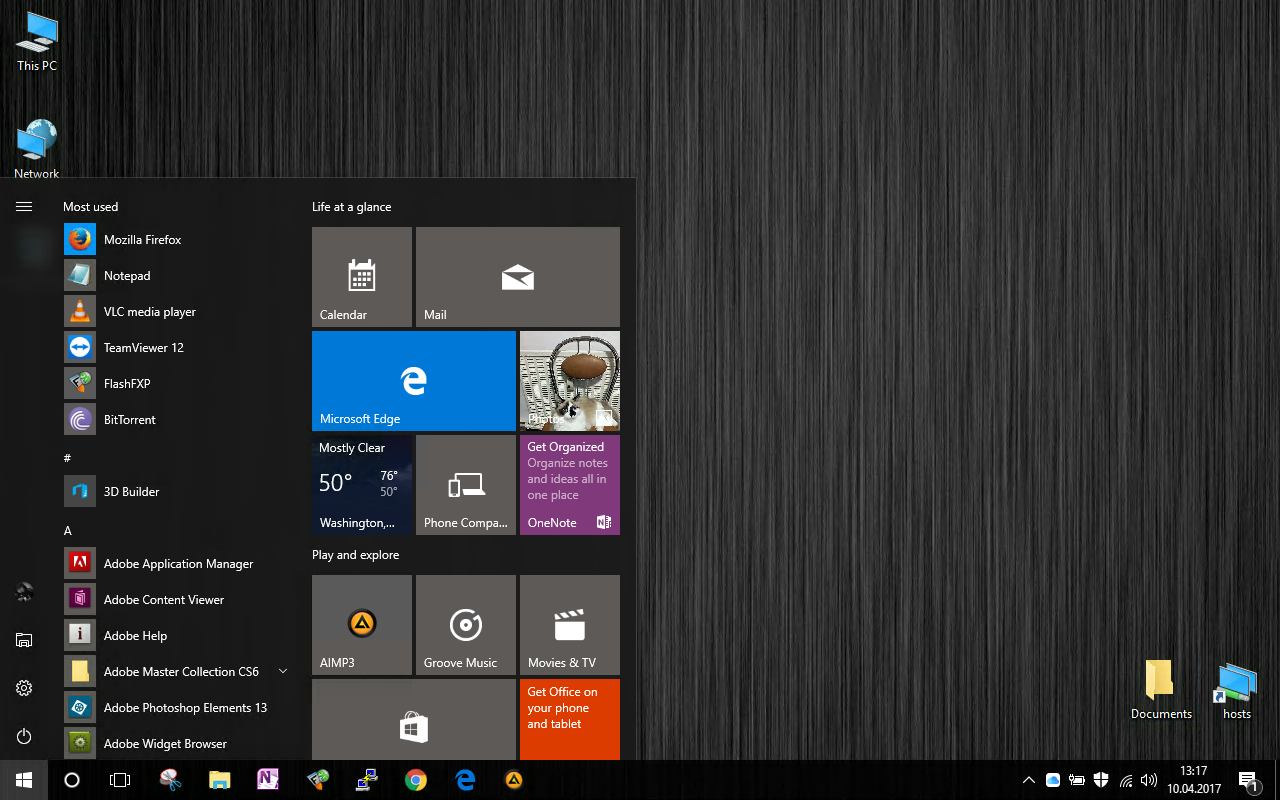
You have access to absolutely all Windows functions, as if you had Windows 10 installed on your MacBook.
This type of connection can be useful in many situations. Either we are a daily user of macOS, and sometimes we need certain operations on Windows, or we have a laptop with Windows 10, whose display a fost spart and can no longer be used (our case). :-)
You may also be interested in...

2 thoughts on “How can we connect with Remote Desktop to a Windows PC from Macos (without TeamViewer)”
I use the analog LiteManager to remotely monitor the computer at work, because the price of the license is less than Teamviewer, which I use at home. After all, it's paid for commercial use and free at home. I think I am not mistaken.
And … is a good alternative to TeamViewer. You are right. Thus, I worked with TeamViewer, I used it to manage multiple computers, and “suspected of commercial use” showed me Thanks!
(Automatic Translated)