
Want to disable the automatic updates of Windows 11 But you don't know how to do it? There are several ways we can stop or put a break at automatic updates in Windows 11.
content
If we return a little to the past to the Windows 10 operating system, we know that there were some good versions in which Microsoft did not allow users to break Operating system updates or to disable. Basically there was no simple option at the hand of anyone, through which Windows 10 Updates can be disabled. We are not talking about the older versions of Windows, when an update restarts the computer without asking us or ragaz to save the files.
I wrote in the past a few tutorials in which we show how they can be disabled actualizarile Windows 10.
- How can we disable updates in Windows 10 [Disable Windows 10 Updates]
- Windows 10 Optional Updates (Non-Security & Drivers)
- Disable / Enable Update Orchestrator Service – Windows 10 Task Manager Processes
MIcrosoft has rethought many elements of the Windows 11 operating system, including the update system – Windows Update. This eliminates the discomfort created in the past, when during the production process the operating system starts updates in background And he was asking for insistent restart.
The new Windows Update al Windows 11 It allows us to break the automatic updates for up to 4 weeks, to prevent the updates' installation restart in an hourly interval, to receive updates only for certain applications and drivers of Windows 11 or to limit the updates when we have a mobile connection with limited data traffic. All these new options are available in the Windows 11 update system – Windows Update.
How we change Windows Update settings in Windows 11
To disable automatic updates of Windows 11 You need to follow the following steps carefully:
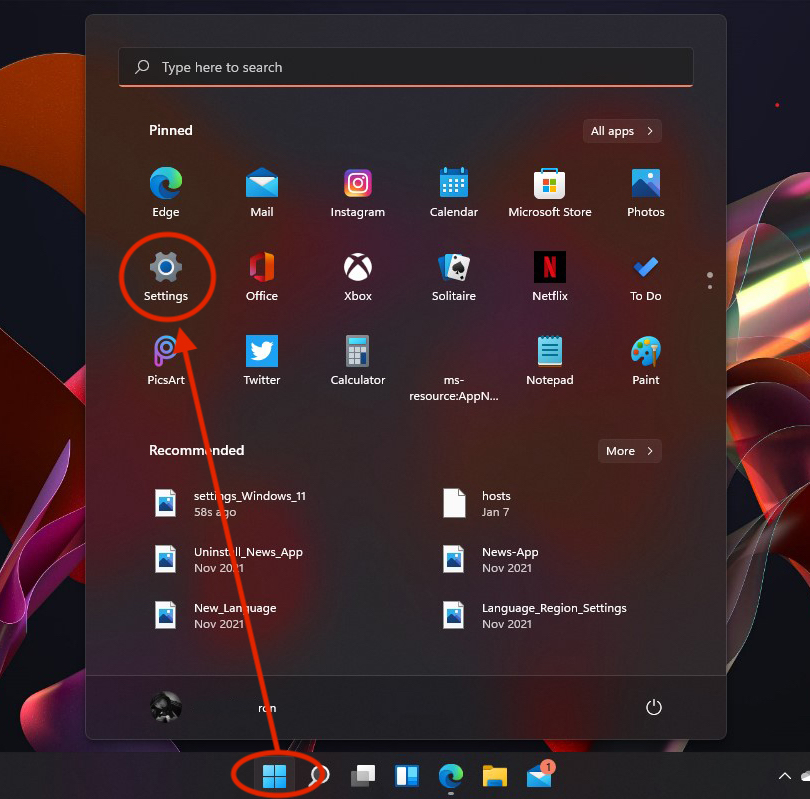
1. We go to the Windows 11 activity bumper, we open “Start” → “Settings“.
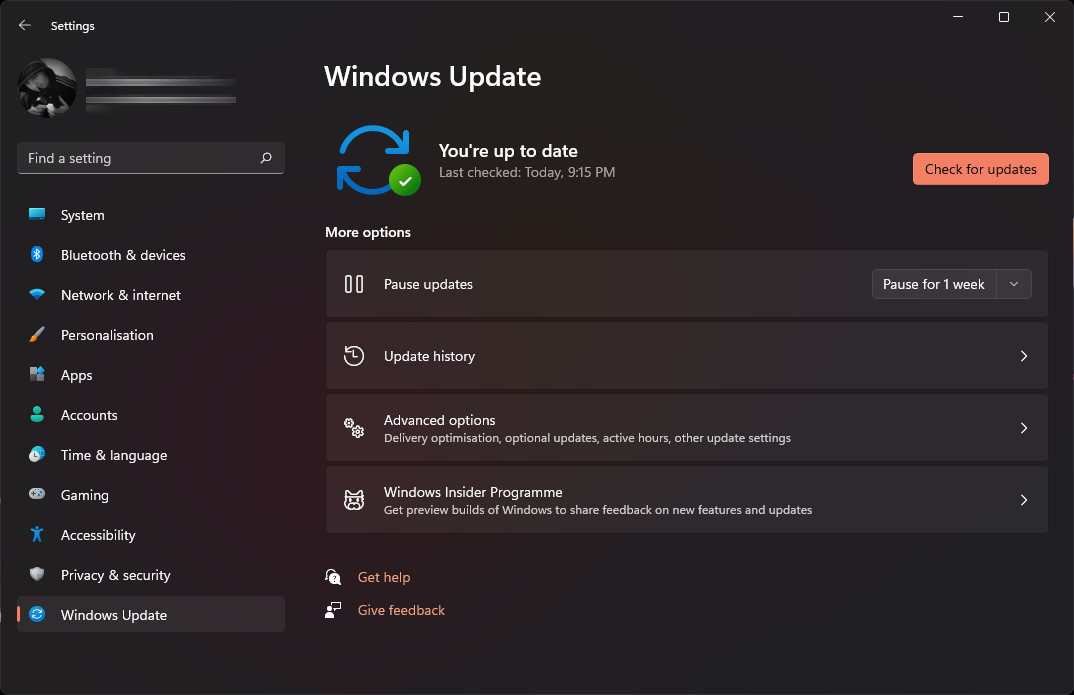
2. In “Settings” We go on the bar from the left side to “Windows Update“. Most of the time this is the last option in the menu “Settings“.
3. In “Windows Update” We have a number of options for periodic checking for updates, discharge, installation and administration of updates of the Windows 11 operating system.
Windows Update Pause Settings – Disable Automatic Updates in Windows 11
Check for updates
It is good to use if we know that we have an update on the break for a longer time interval, and in the meantime an important update has been launched for the session or stability of the operating system.
Pause updates
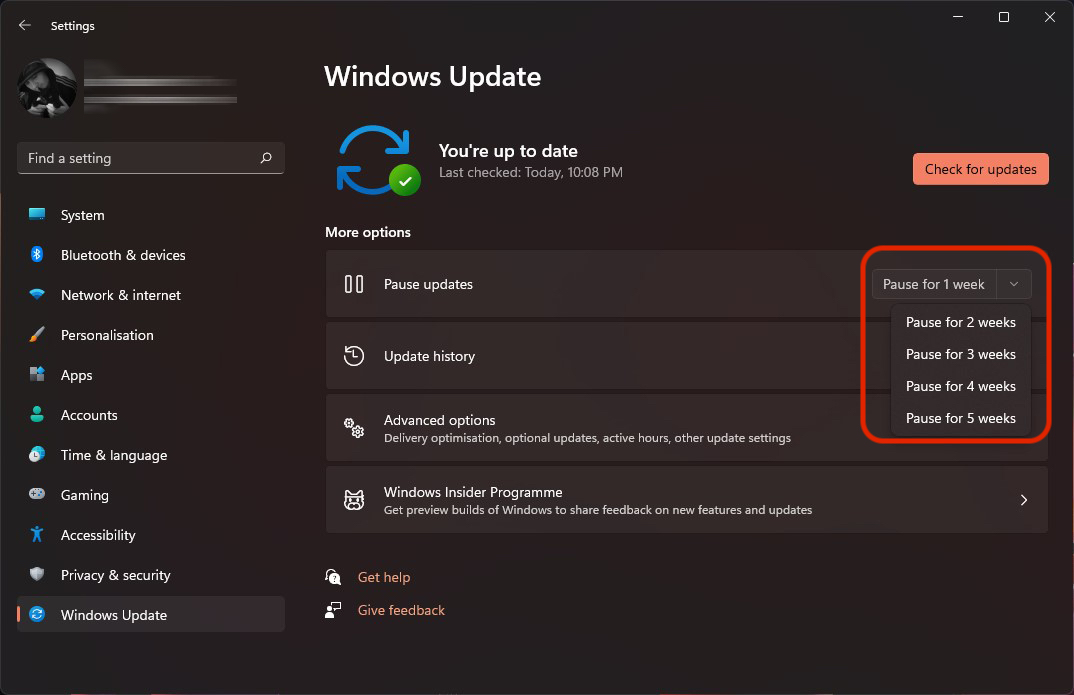
By default, Windows 11 check daily or even several times a day if available updates. These can be downloaded and installed automatically, without the user notification.
With the latest versions of Windows 11, the option by which we can choose to interrupt the operating system updates for a period of up to 5 weeks was introduced.
The “Pause updates” We choose: “pause for 1 week” – “pause for 5 weeks”.
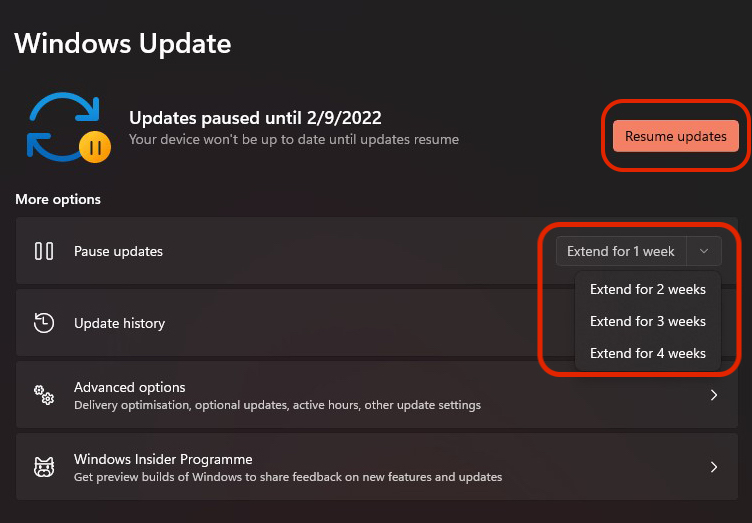
After we put the updates on the break, the button “Check for updates” will turn into “Resume updates“. Option by which we can cancel the pause period set. We can choose and extend the period of “pause updates” with an interval of up to 4 weeks. Therefore, we can interrupt the Windows 11 updates over a period of 9 weeks.
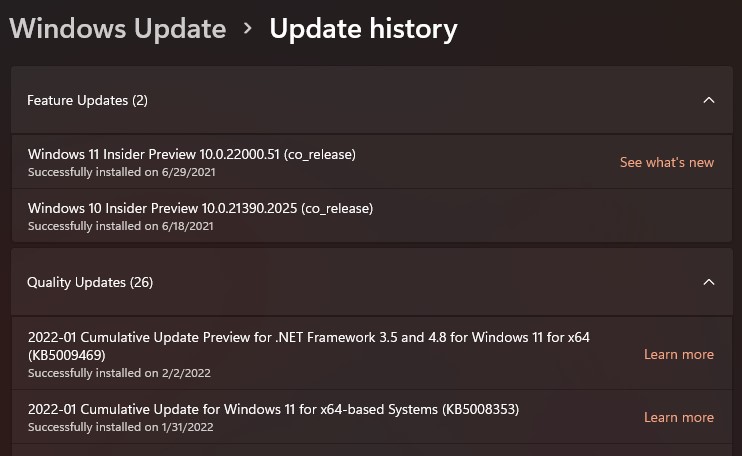
Update History
And this section of Windows Update has evolved. Microsoft now offers information about which update. What bugs were corrected, what new features have been made or what security breaches were resolved.
Every update in “Update history” It is accompanied by a link that the user can find complete information about each update. “Learn more” or “See what’s new” In the case of upgrades.
Next, there are a number of advanced settings through which we can choose to receive updates of Microsoft applications installed on the system, to change their background discharge, plus many more.
You may also be interested in...
